Manual Contents
This manual is organized into four parts. Registrar setup (Parts 1–2) is done once per term; student self-enrollment (Parts 3–4) is done per student.
Overview
RegistrarThis part explains how the registrar sets up prerequisite subjects in the SRMS Registrar Module. Prerequisites define which subjects a student must complete before being allowed to enlist in a more advanced subject, and they are configured per Course and Major. Setting up prerequisites correctly lets the system validate each student's subject enlistment during enrollment.
Open Prerequisite Subjects and Click Add Prerequisite
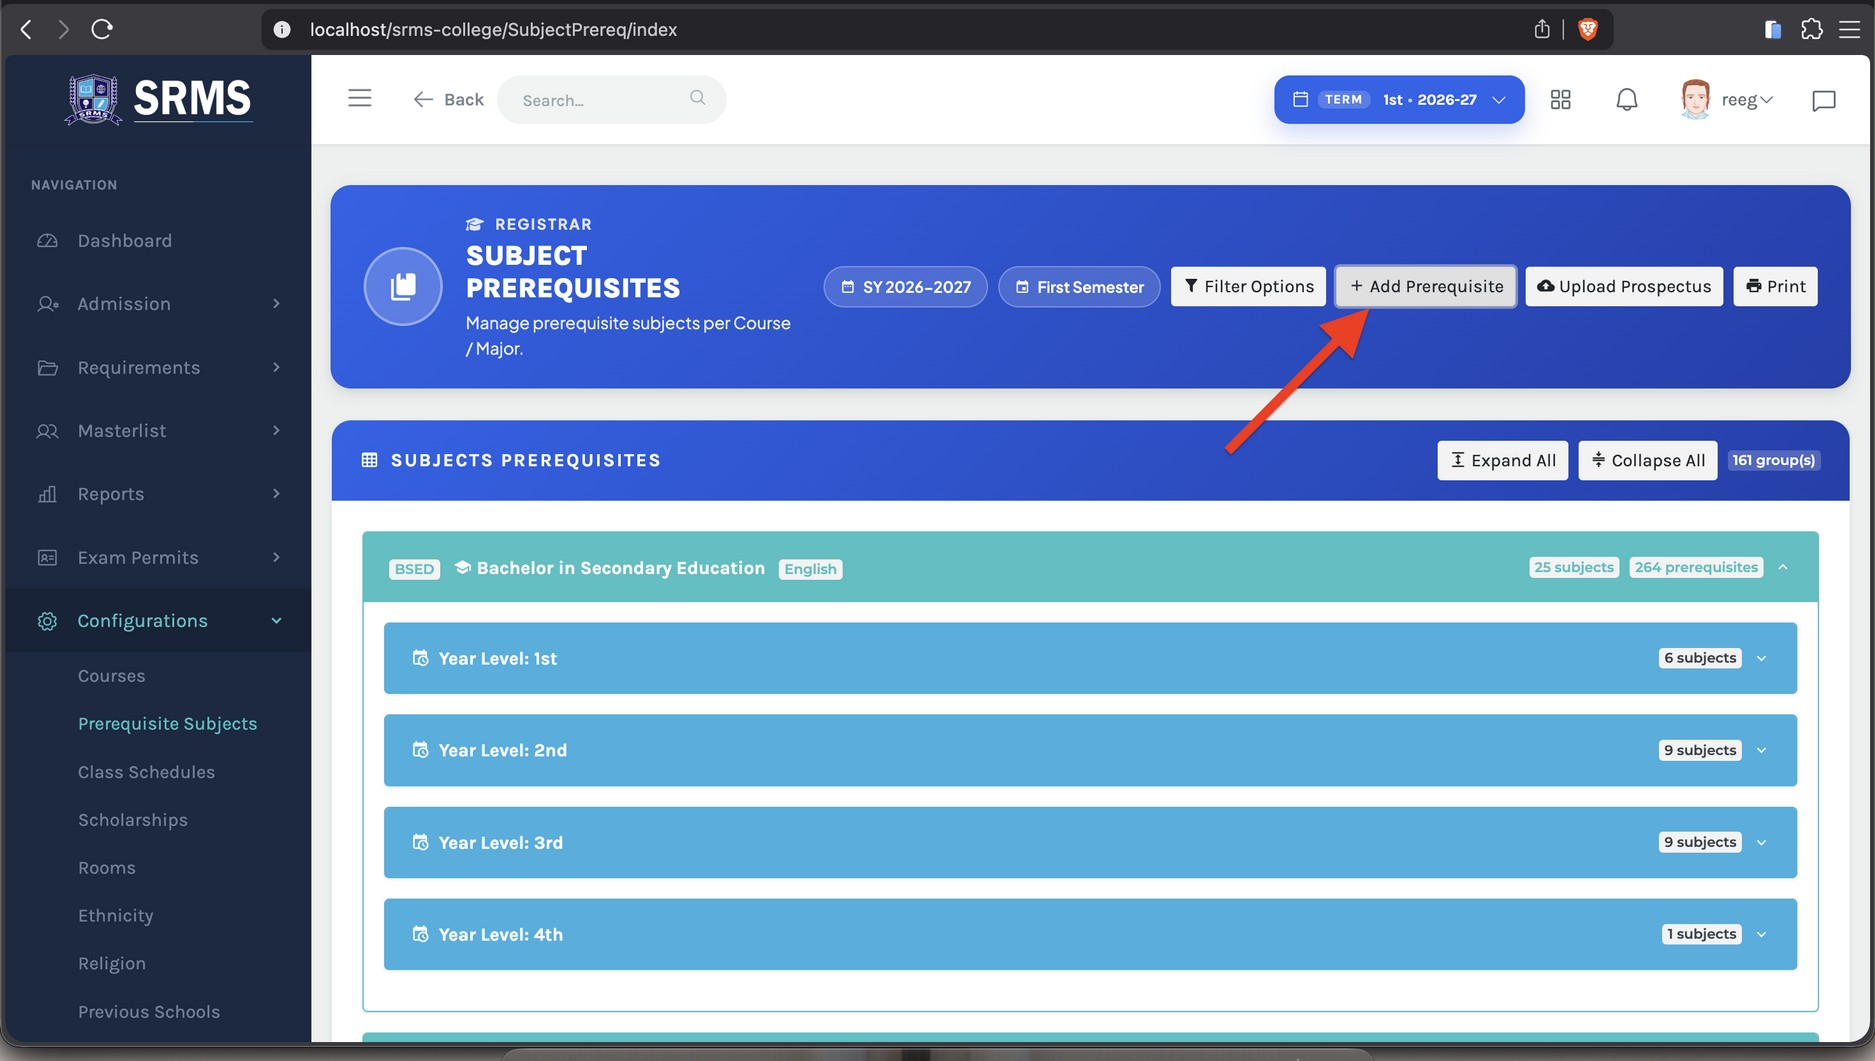
In the Registrar Module, open the Configurations menu and select Prerequisite Subjects. On the Subject Prerequisites page, click the ADD PREREQUISITE button at the top right.
 Click to expand
Select the Subject and Its Prerequisites, then Save
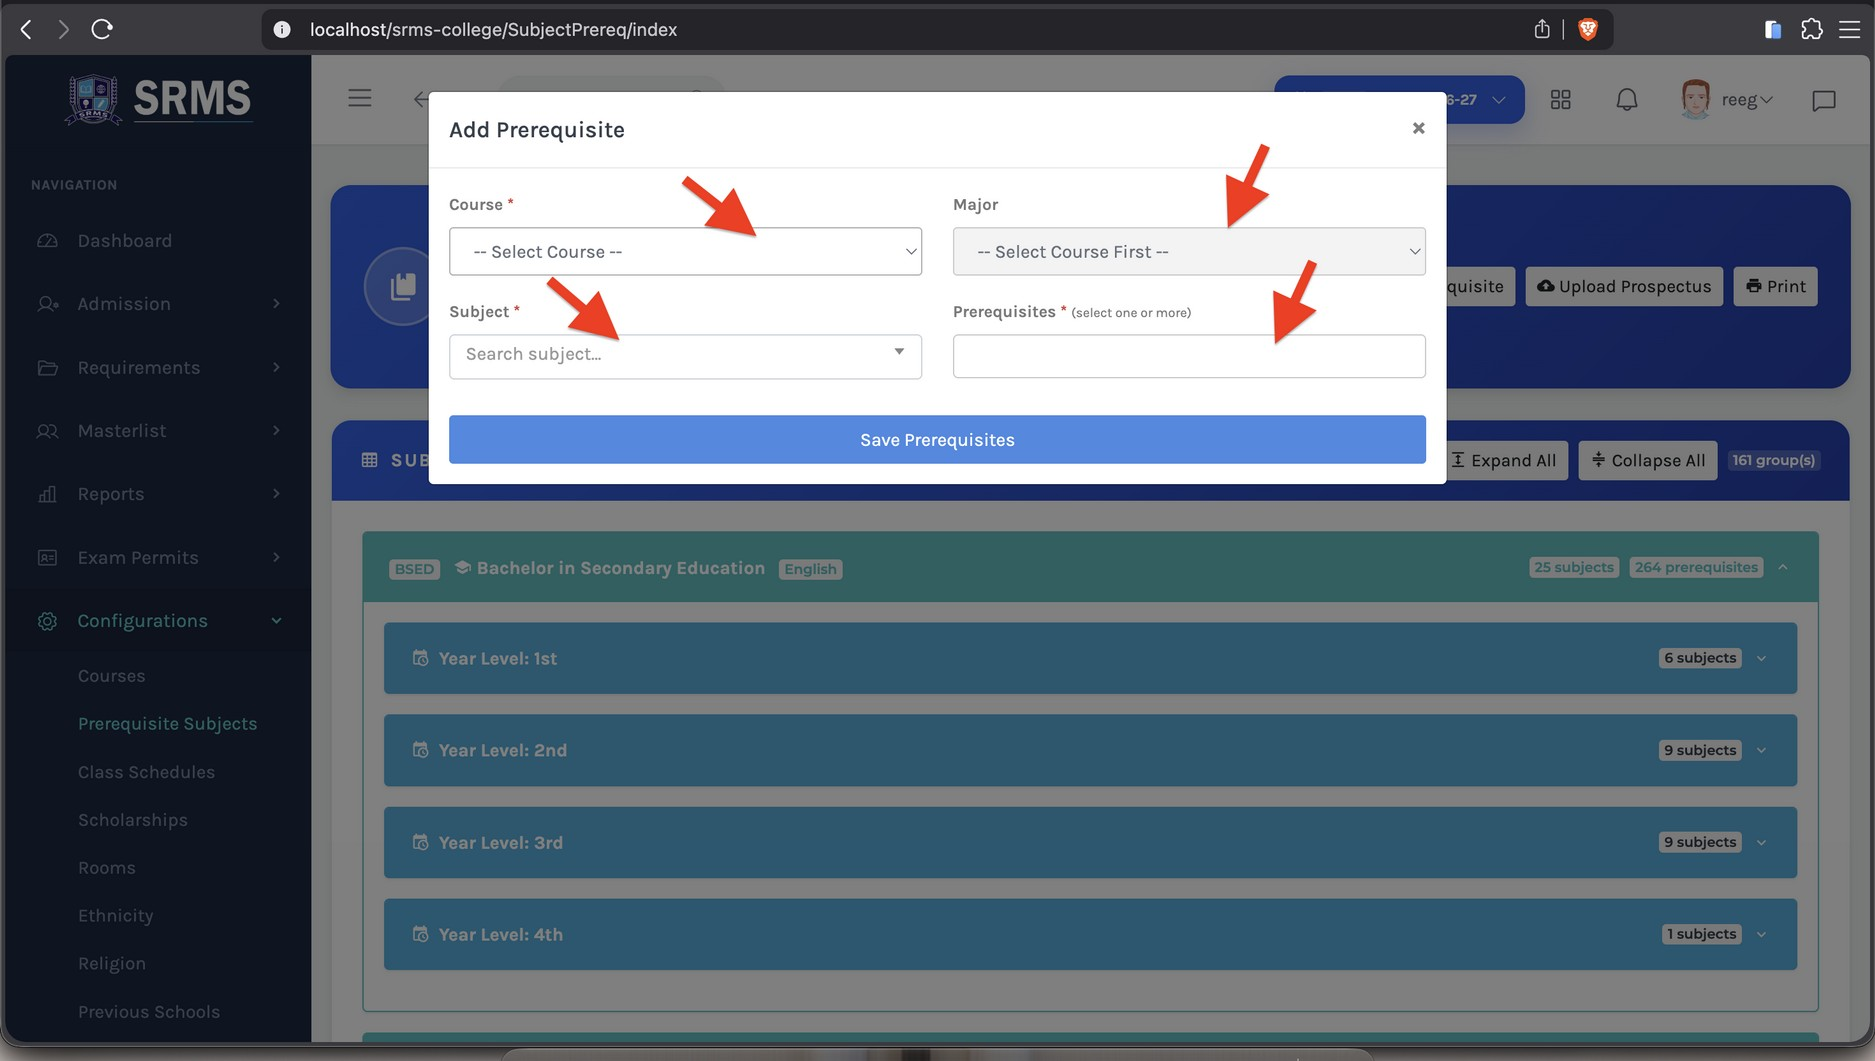
In the Add Prerequisite window, fill in the fields in order: select the Course, then the Major, then the Subject you are configuring. In the Prerequisites field, select all prerequisite subjects that apply (one or more). When everything is set, click SAVE PREREQUISITES.
 Click to expand
Review Your Encoded Prerequisites
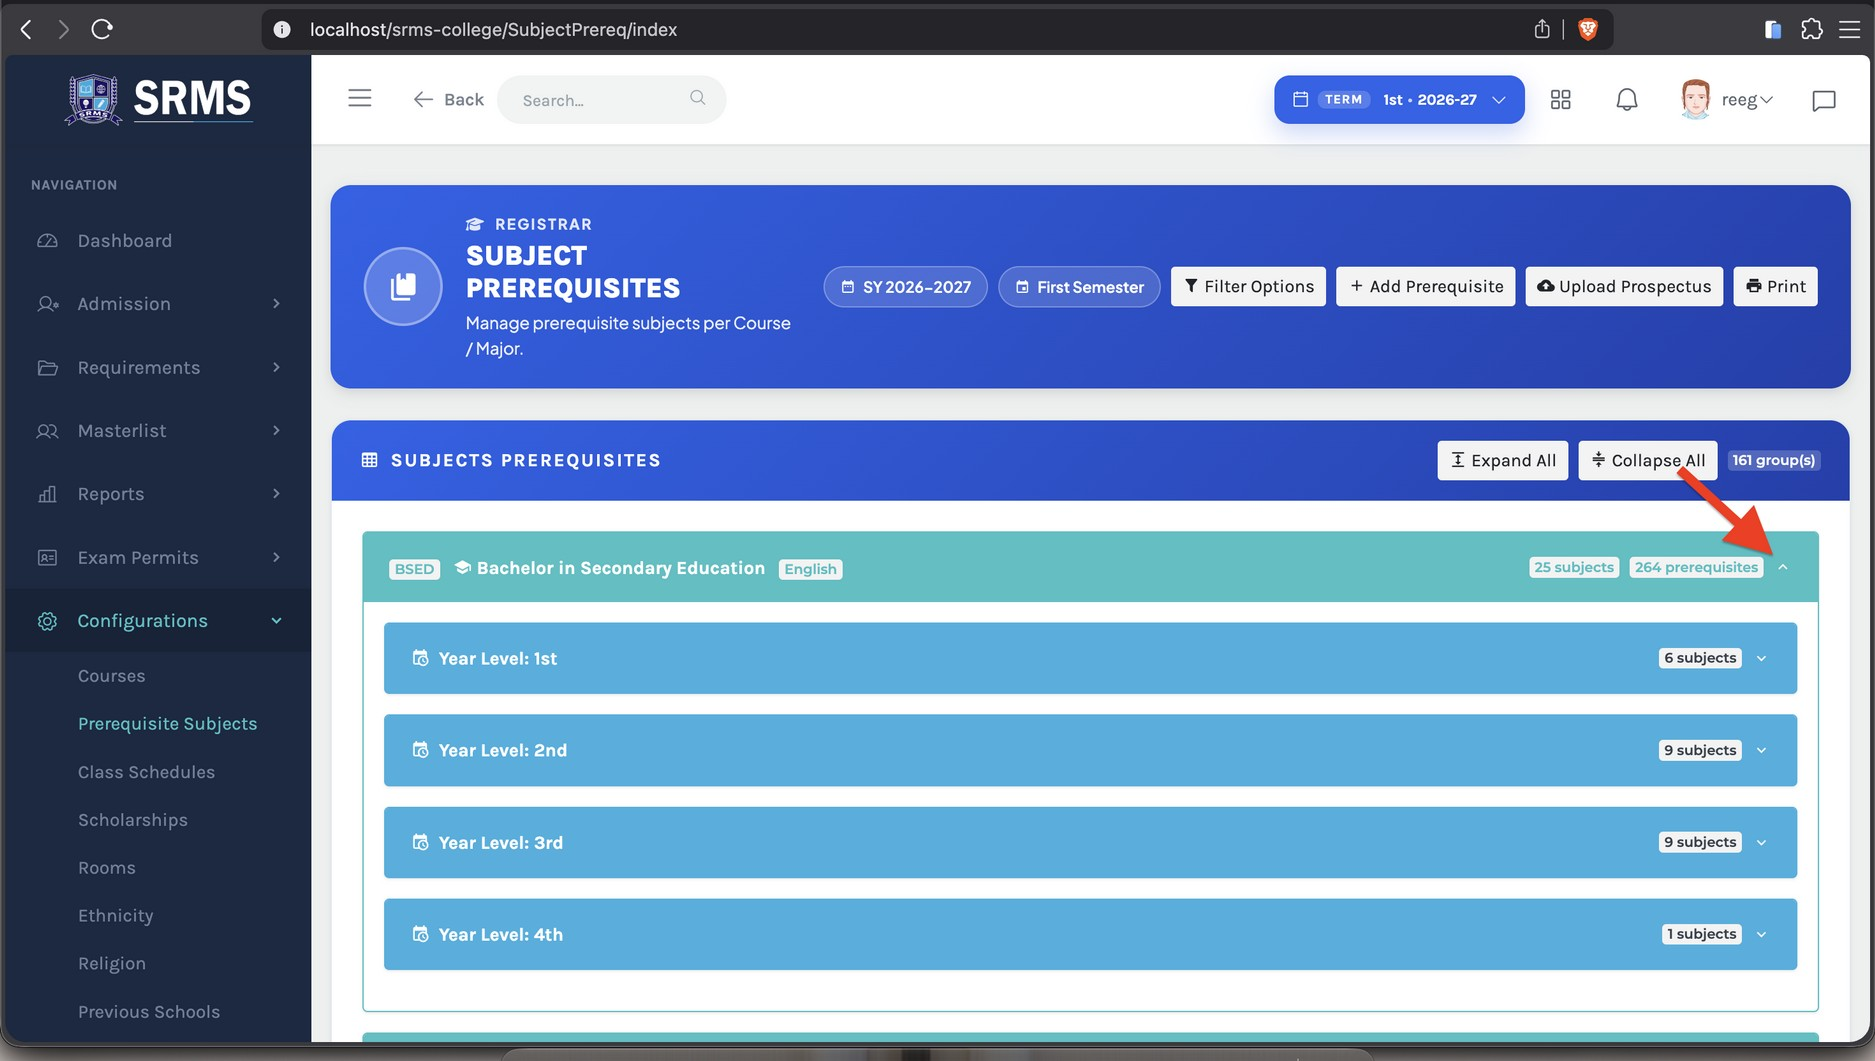
Your newly encoded prerequisites now appear in the list below, grouped by Course/Major and Year Level. Click a group, or use EXPAND ALL, to view the subjects and their assigned prerequisites; use COLLAPSE ALL to hide them again.
 Click to expand
Tip: Repeat the steps above for each subject that requires prerequisites.
Overview
RegistrarThis part explains how to set up class schedules in the SRMS Registrar Module. Schedules are managed per Program for the active School Year and Semester. There are two ways to encode schedules — one by one, or by mass encoding all subjects of a program at once. This part also covers how to create a section when none exists yet.
Getting Started: Open Class Schedules
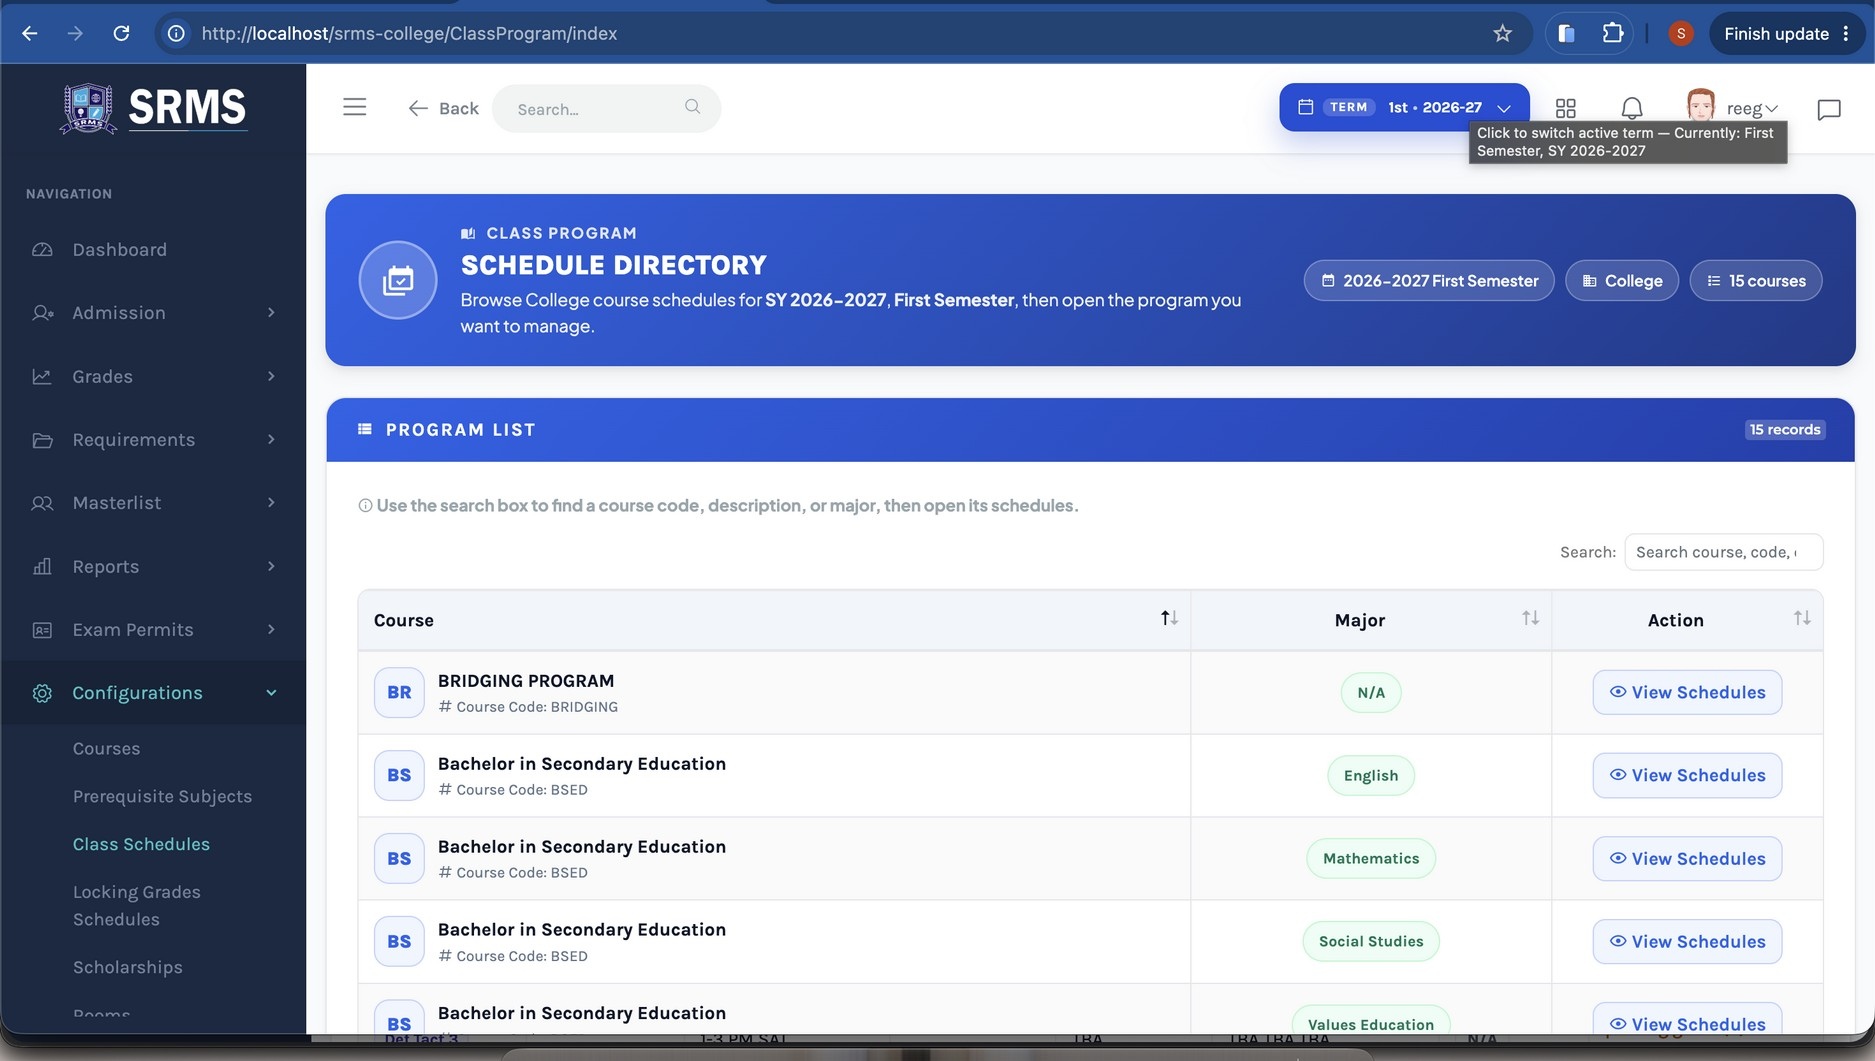
In the Registrar Module, open the Configurations menu and select Class Schedules. The Schedule Directory appears, showing the Program List for the active term. Find the program you want to manage and click View Schedules on its row.
 Click to expand
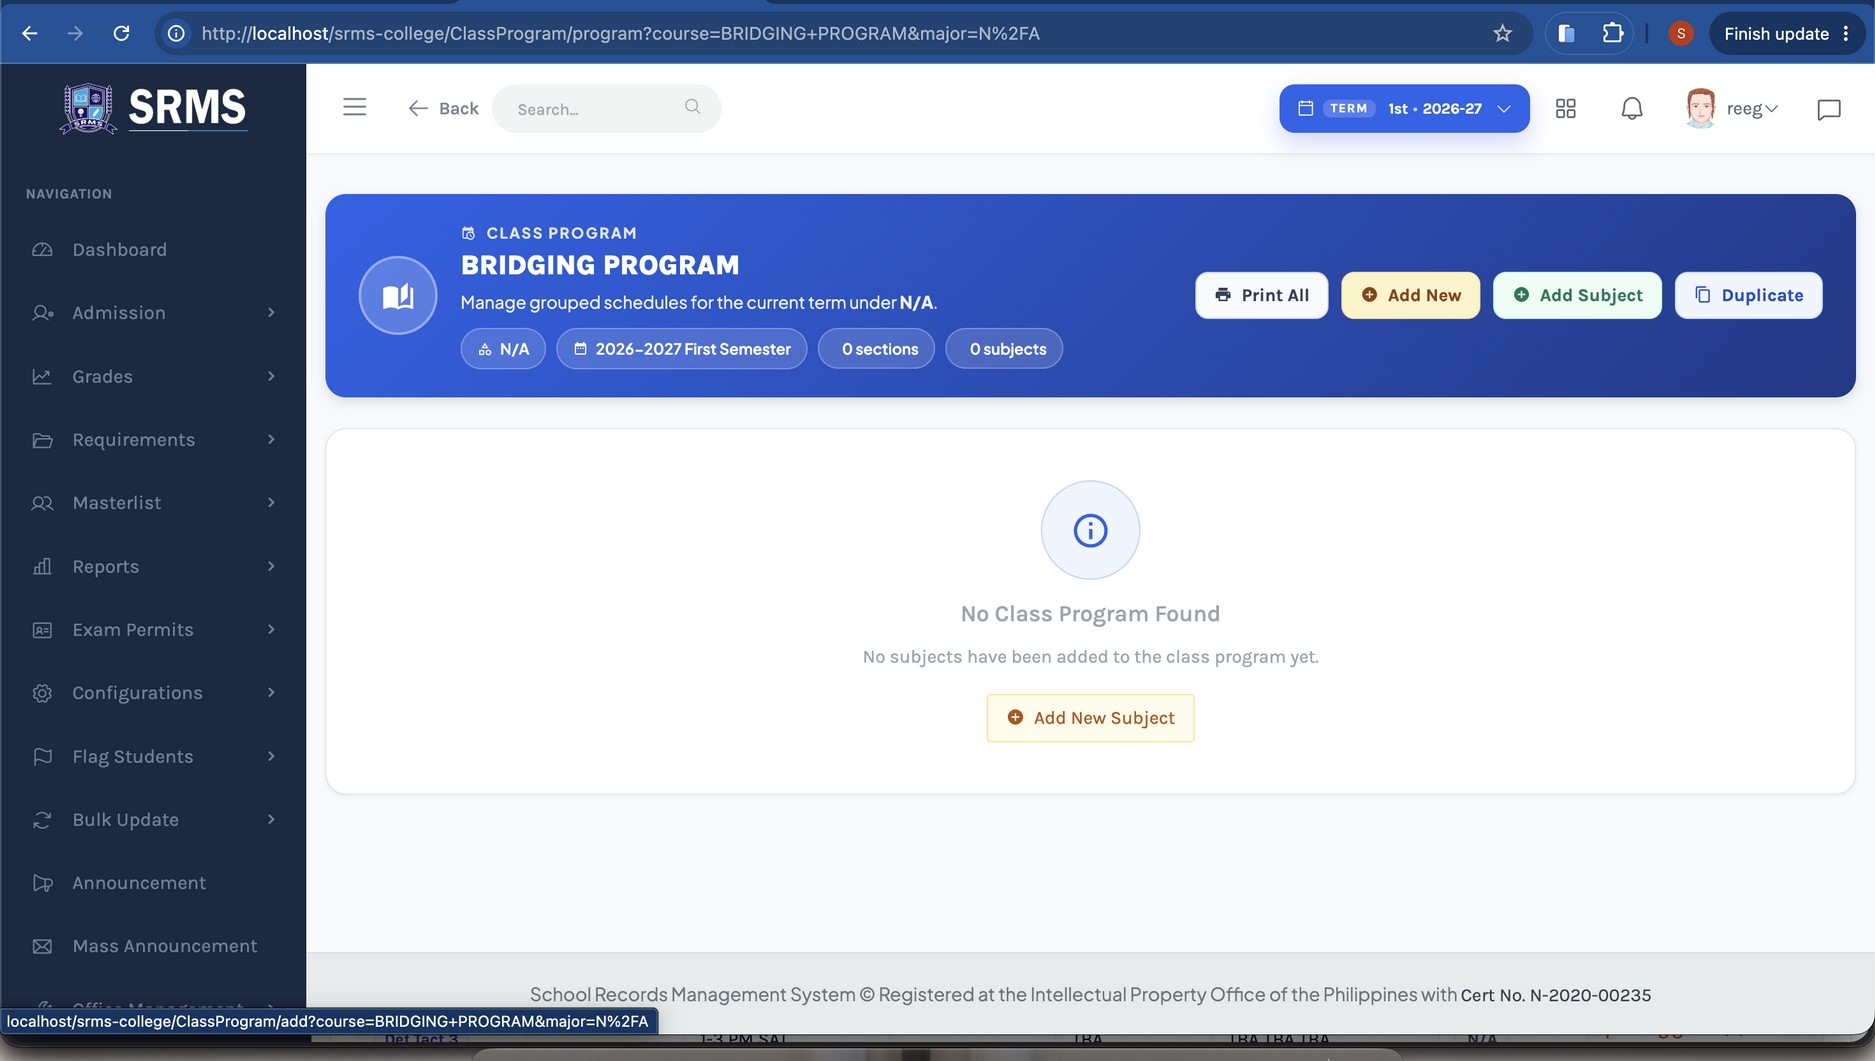
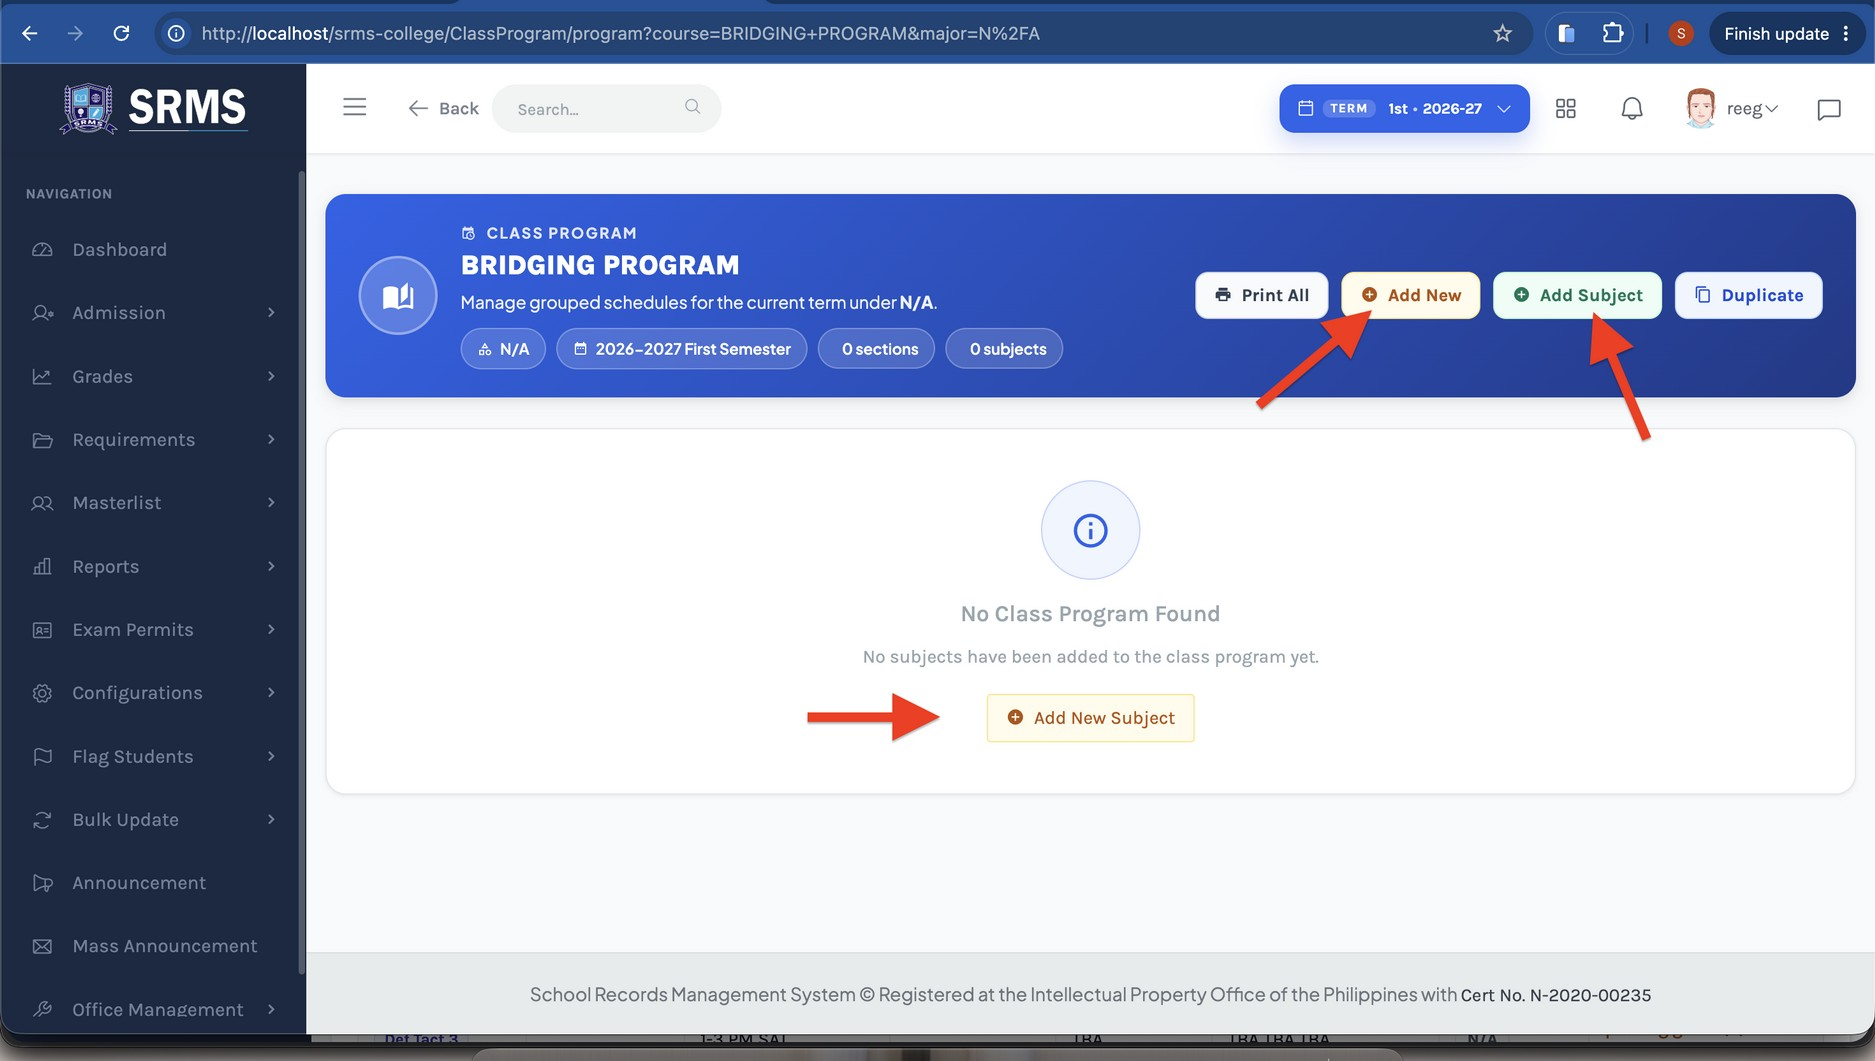
The program's Class Program page opens. From here you can encode schedules one by one using Add Subject, or in bulk using Add New. Both buttons are at the top right.
 Click to expand
 Click to expand
Method 1 — Encode Subjects One by One
- 1 Click the Add Subject button.
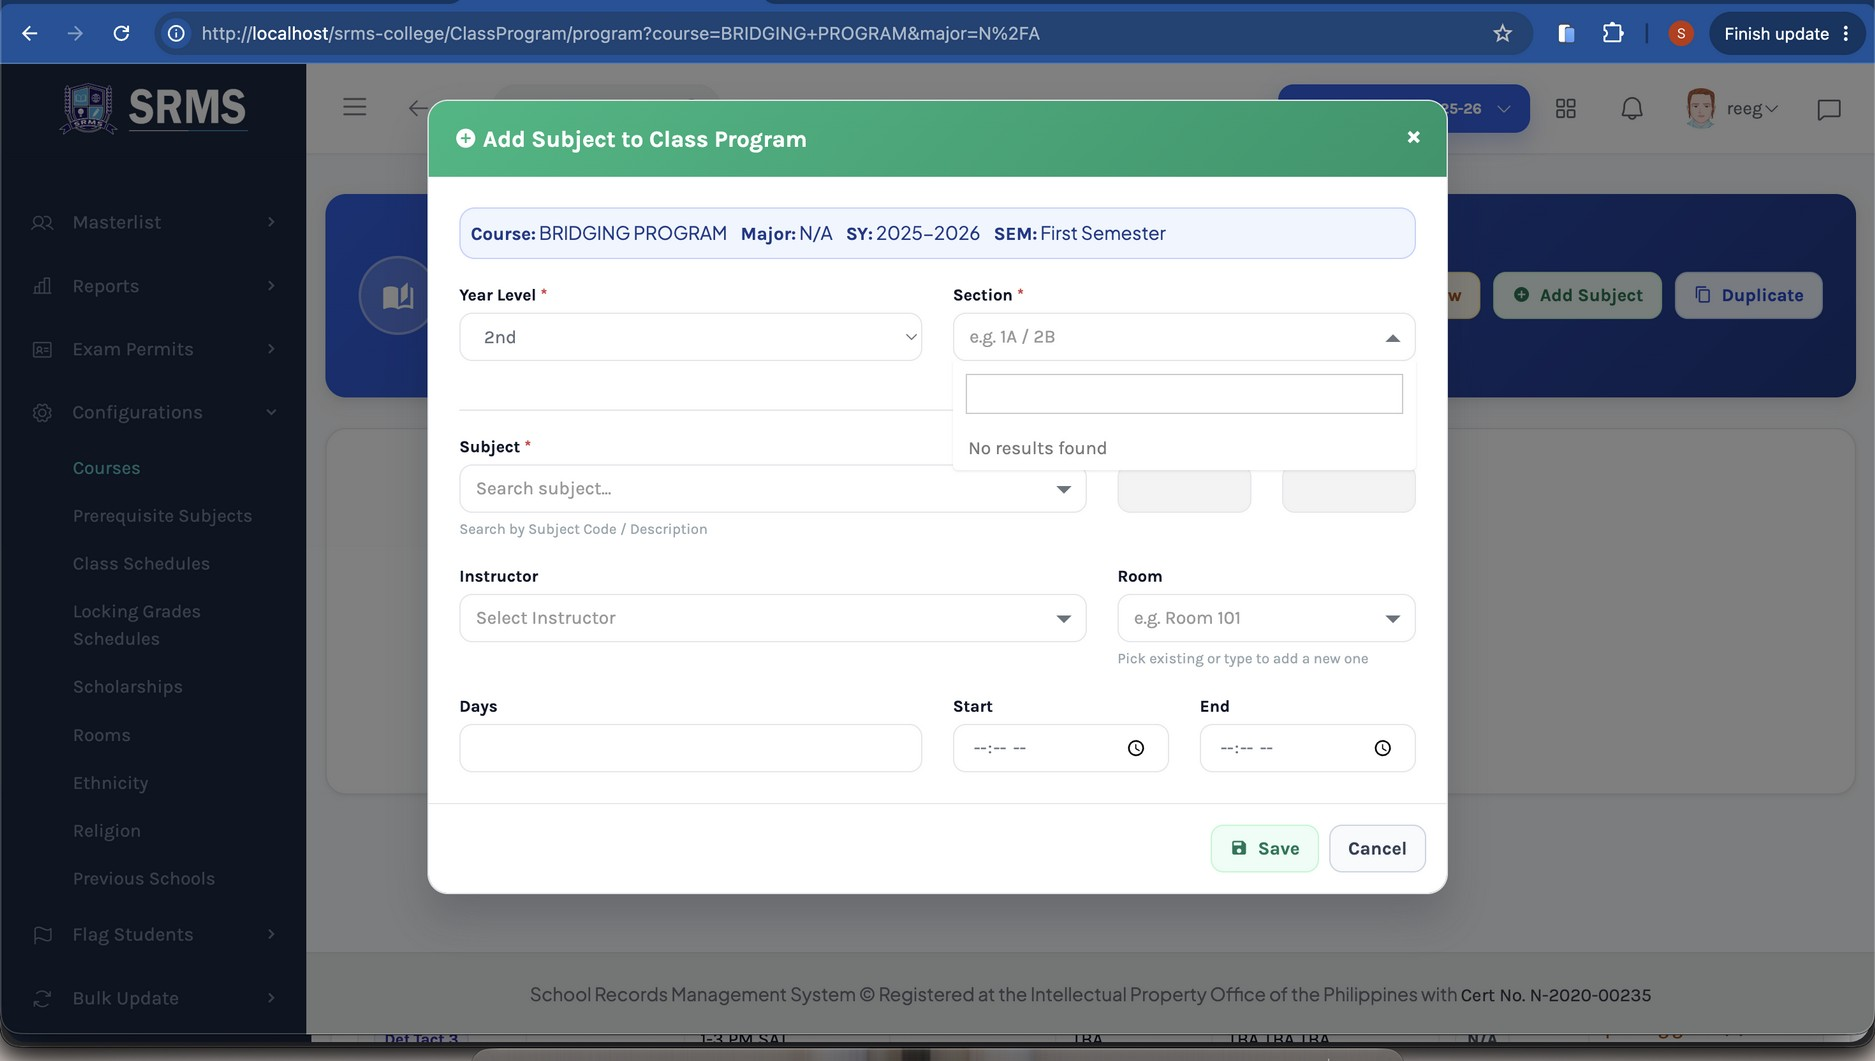
- 2 In the Add Subject to Class Program window, select the Year Level and Section, search and select the Subject, choose the Instructor and Room, then input the Days, Start, and End times.
- 3 Click Save.
 Click to expand
Note: No section yet? If the Section dropdown shows "No results found," a section has not been created for that year level. Create one first using the next step, then return to this window.
 Click to expand
Creating a Section (When No Section Exists)
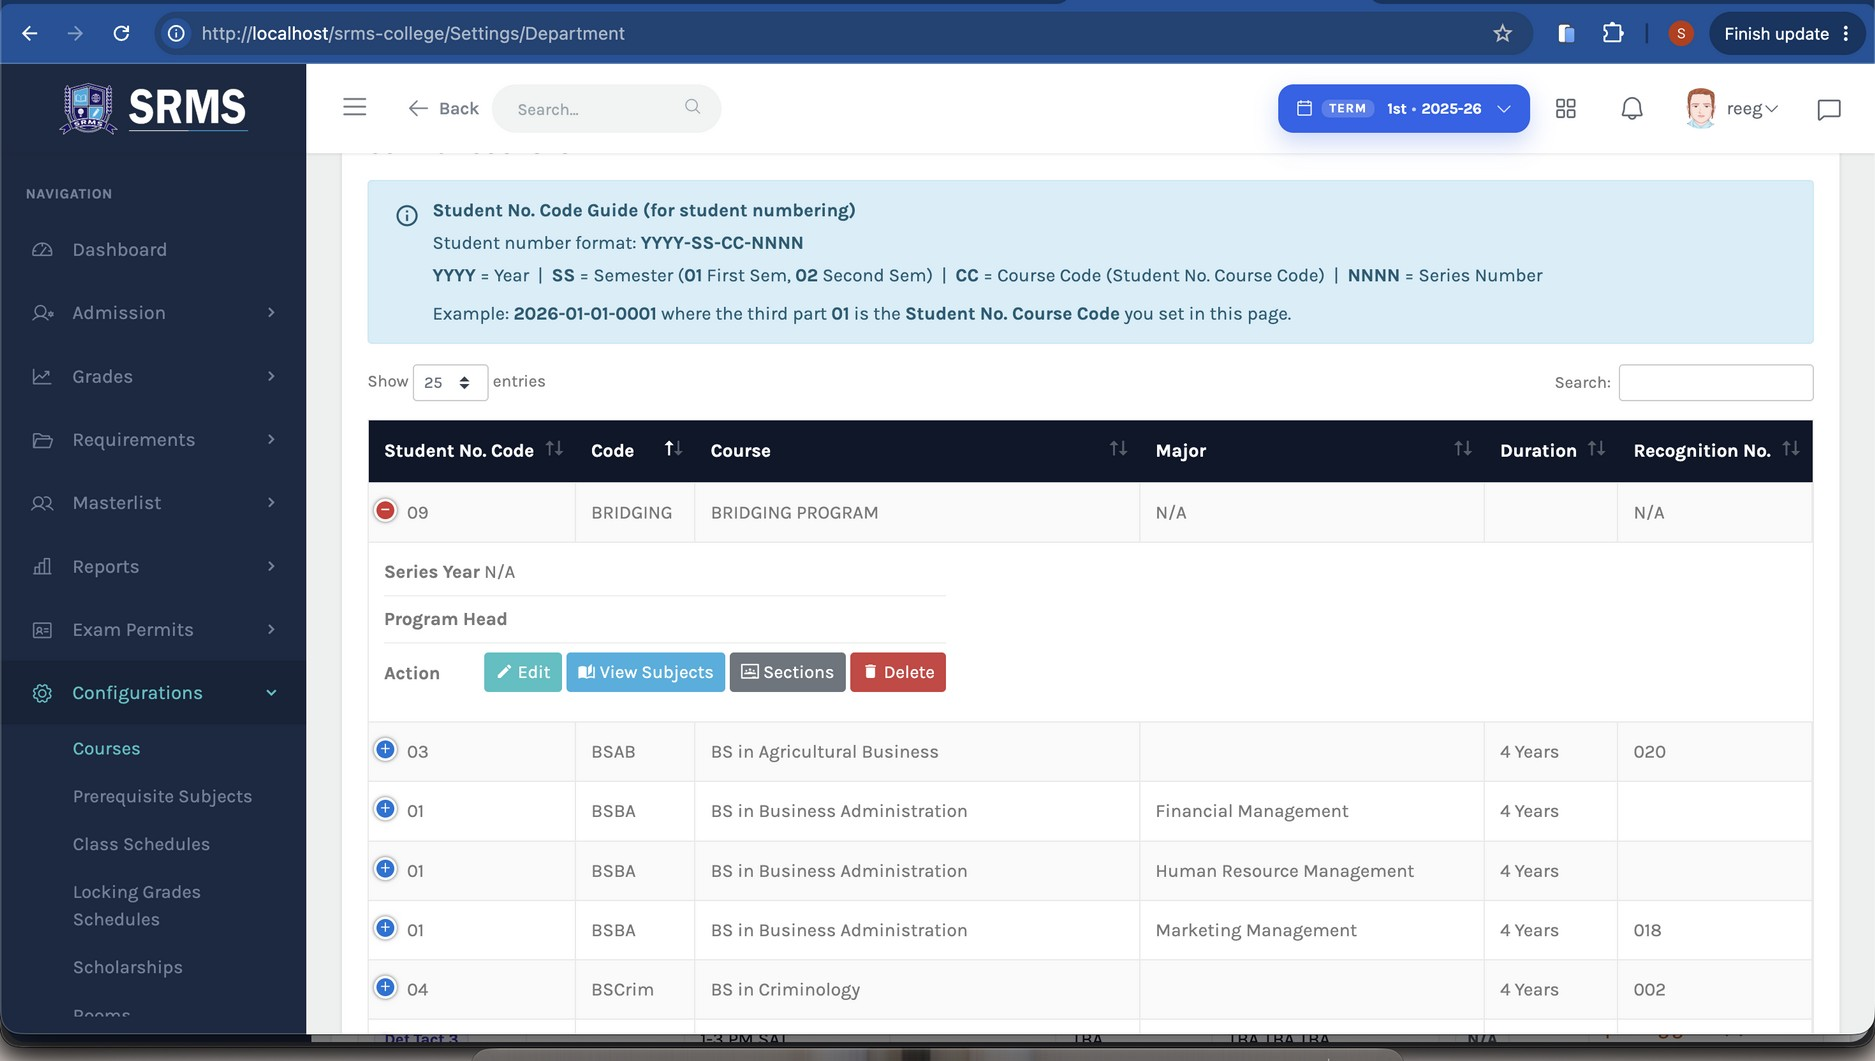
- 1 In the Configurations menu, go to Courses.
- 2 Find the Program in the list, and under the Action column click the Sections button. The Section Management page opens.
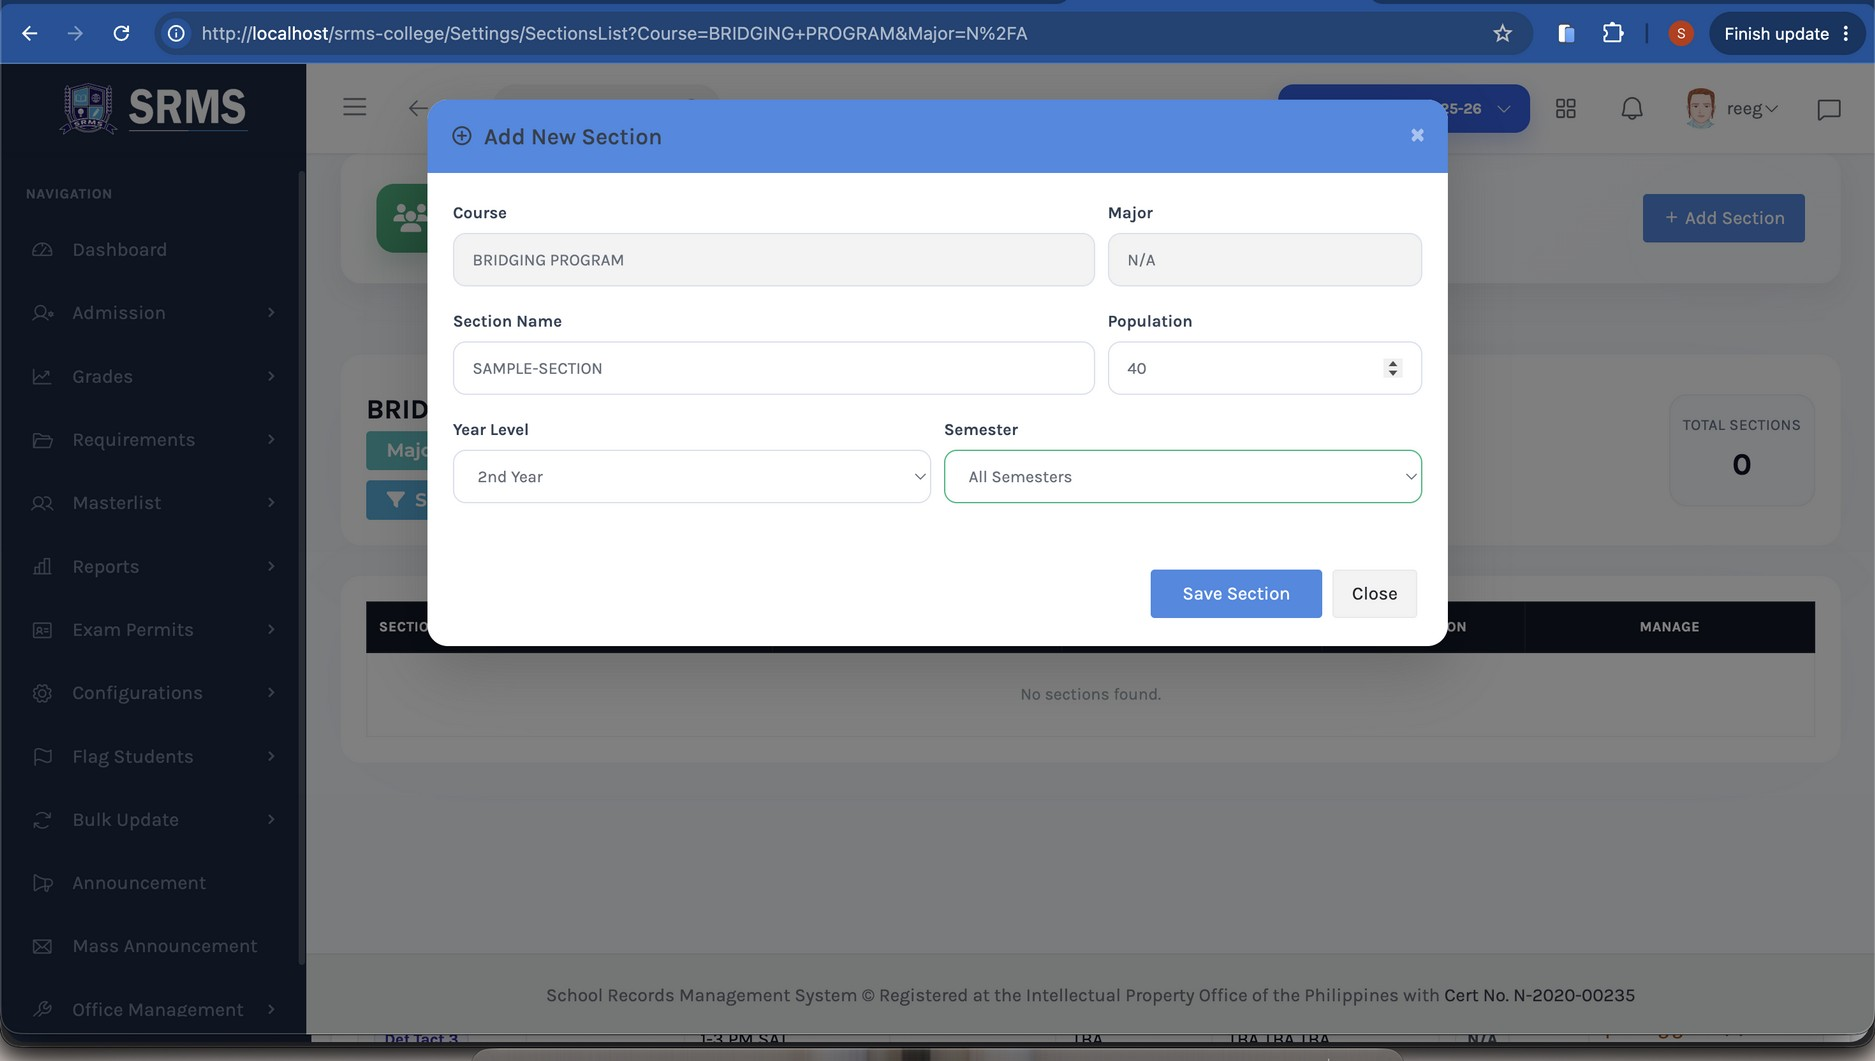
- 3 Click the Add Section button.
- 4 Fill up the Section Name and Population (the maximum number of students allowed in that section), then select the Year Level and Semester.
- 5 Click Save Section.
 Click to expand
 Click to expand
 Click to expand
Continue — Finish Encoding One by One
Go back to the Add Subject to Class Program window. The section you just created now appears in the Section dropdown.
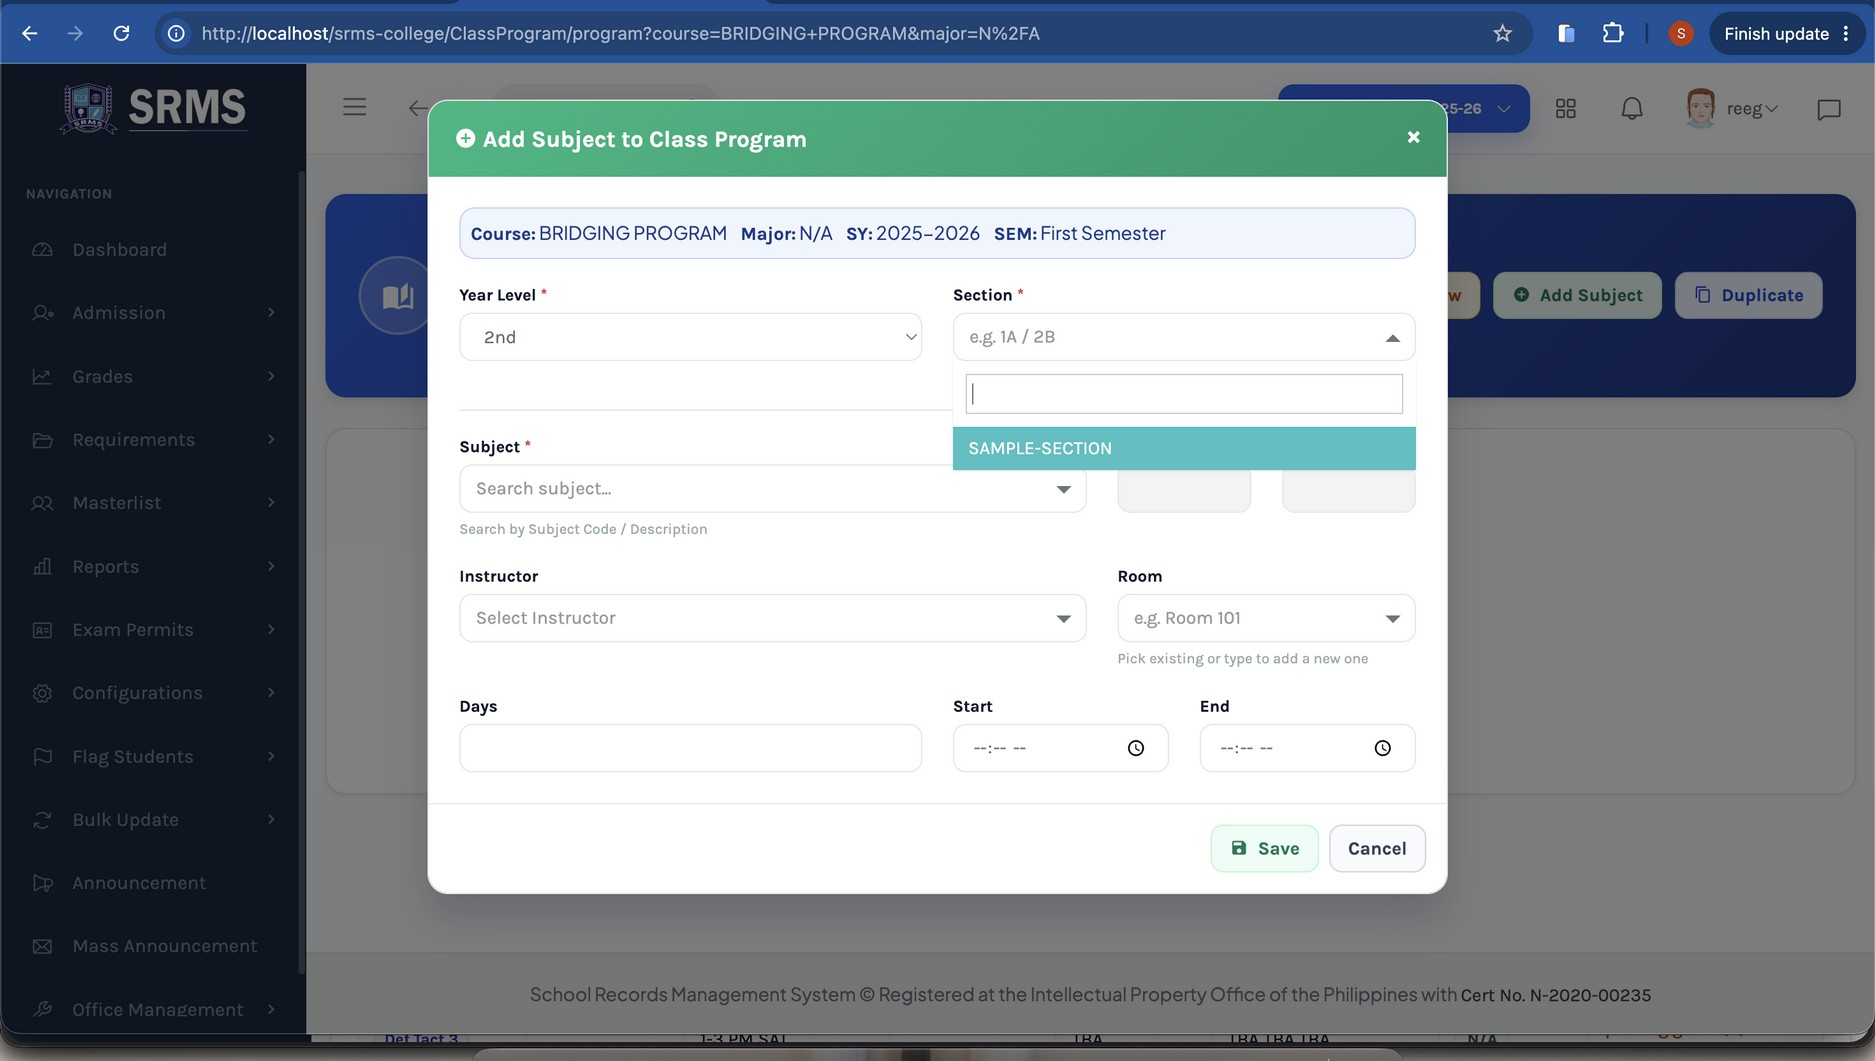 Click to expand
Select the section along with the subject, instructor, room, days, and time, then click Save to finish adding the subject.
 Click to expand
Method 2 — Mass Encoding
Mass encoding lets you schedule all subjects of a program in a single screen instead of adding them one at a time.
- 1 Go to Configurations → Class Schedules and open a program from the Program List (as in the Getting Started step).
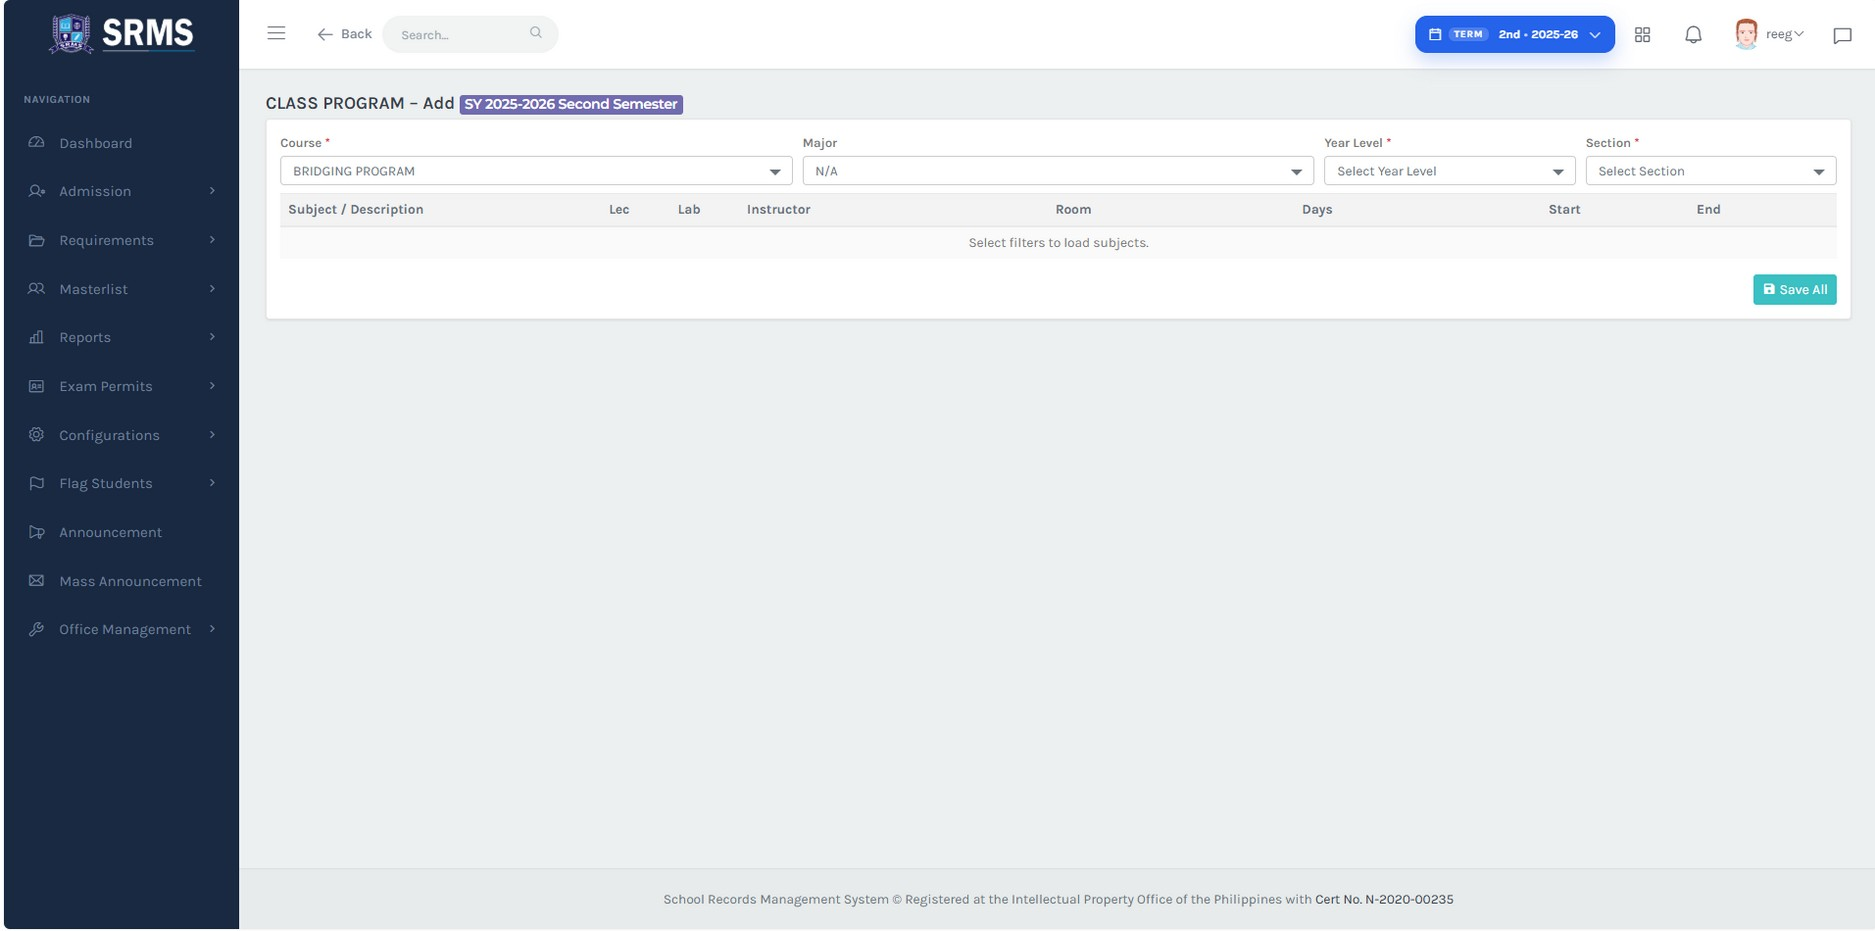
- 2 Click the Add New button.
- 3 Select the Course, Major, Year Level, and Section.
- 4 All subjects under the program load automatically. For each row/subject, set the Instructor, Room, Days, Start, and End.
- 5 Click Save All.
 Click to expand
Tip: The class schedules are now configured for the selected program and term. Repeat either method for each program, year level, and section you need to schedule.
Overview
Student + RegistrarThis part is intended for newly enrolling (first-time) students and walks both the student and the registrar through the complete hybrid self-enrollment process. Enrollment is completed across two connected platforms: the SRMS Portal (where students sign up, log in, and enroll themselves) and the SRMS Desktop application (where the registrar profiles, enrolls, and officially records each student). Follow the steps in order, as each stage depends on the one before it.
Process at a Glance
- Student Steps 1–4: Sign up on the SRMS Portal and secure your account credentials.
- Registrar Step 5: Profile the student from online in the SRMS Desktop application.
- Student Steps 6–8: Log in, enroll, and enlist subjects through the portal.
- Registrar Steps 9–10: Enroll the student and enlist their subjects in the Desktop application.
- Registrar Step 11: Print the Certificate of Enrollment.
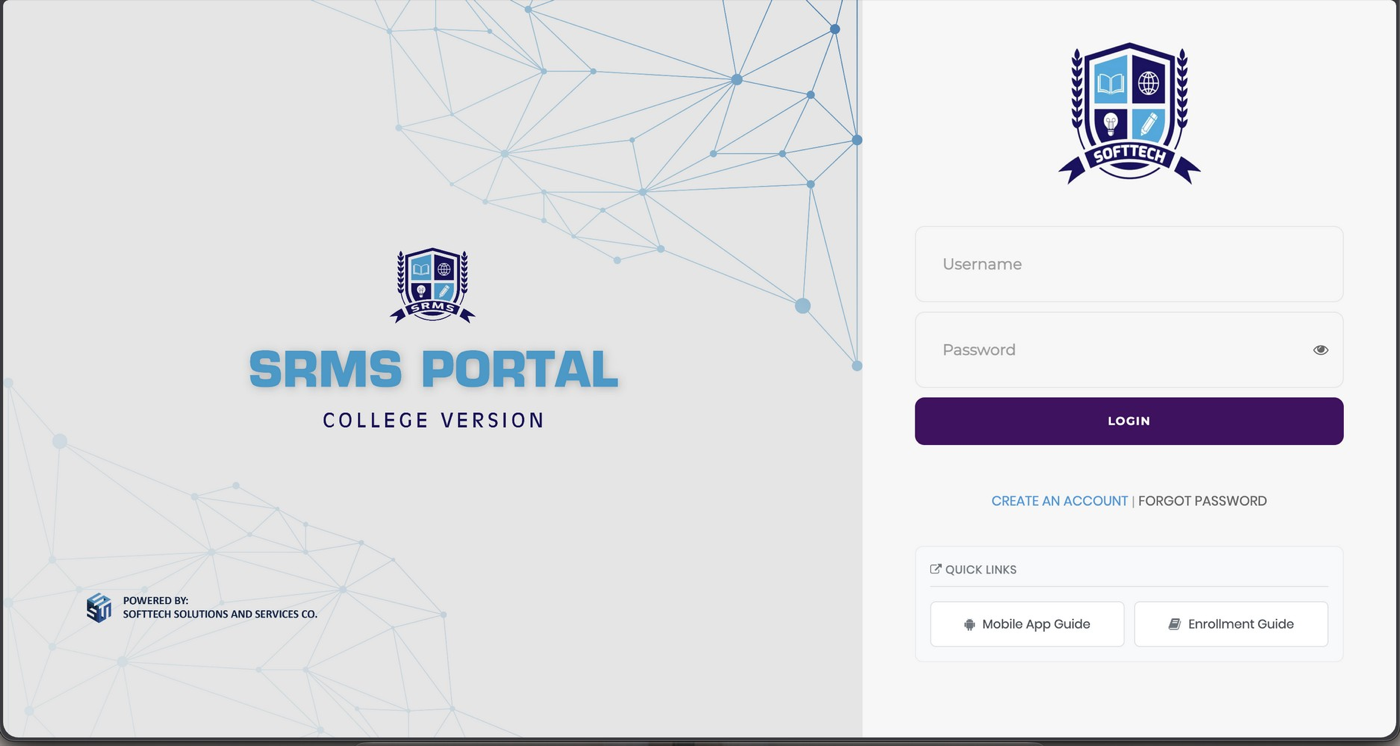
Open the SRMS Portal and Create an Account
Open a web browser and go to the SRMS Portal login page. On the right-hand panel, click CREATE AN ACCOUNT to begin the sign-up process.
https://knp-srms.com/Registration
 Click to expand
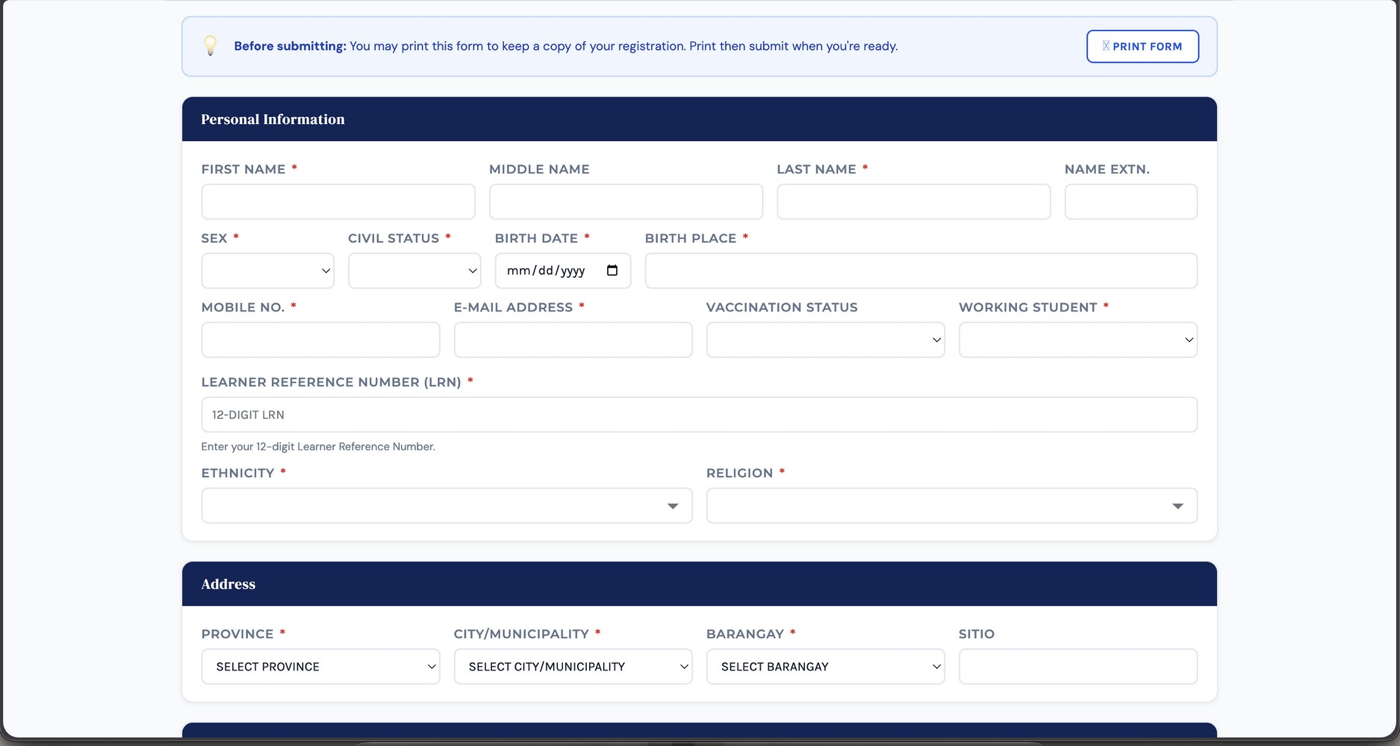
Complete the Sign-Up Form
Fill out the registration form completely and accurately. Provide your Personal Information, 12-digit Learner Reference Number (LRN), and complete Address details. Fields marked with an asterisk (*) are required.
Tip: You may click PRINT FORM to keep a copy of your registration before submitting. Review all entries carefully, then submit the form.
 Click to expand
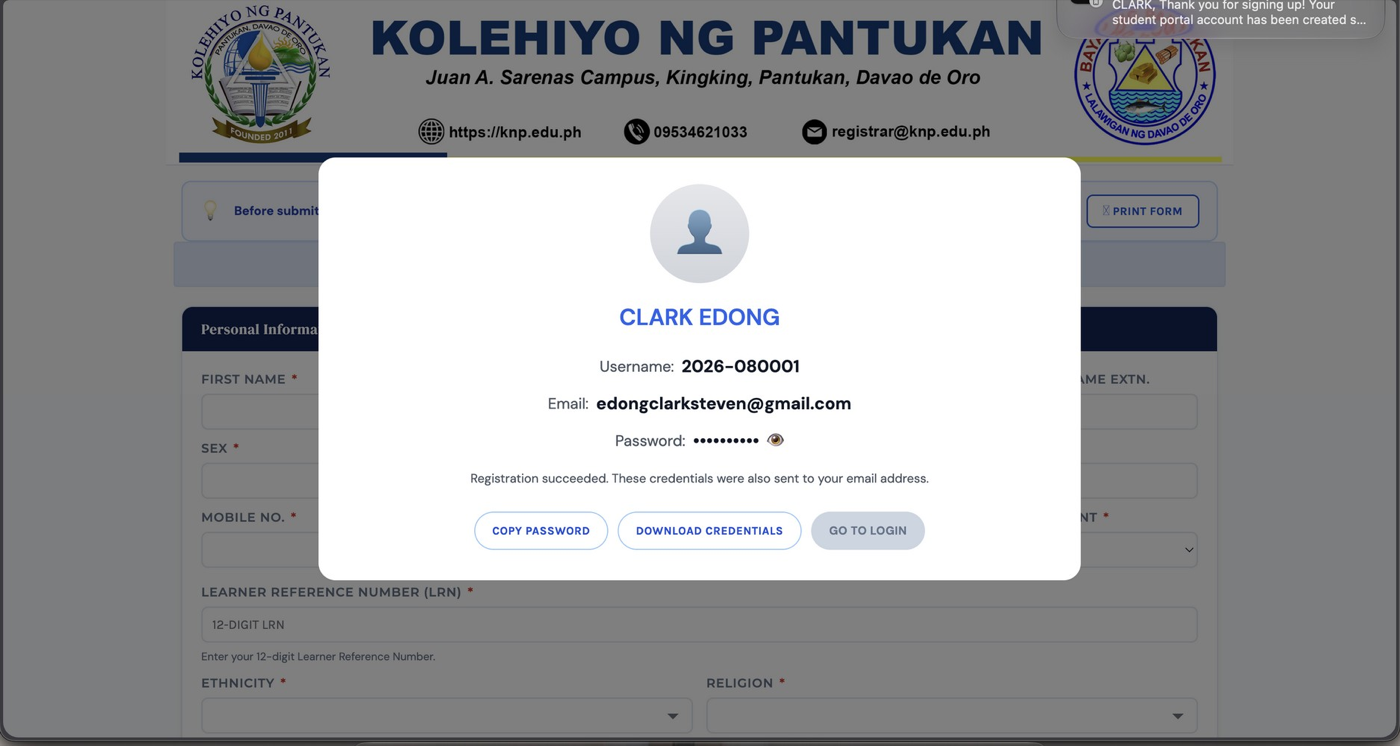
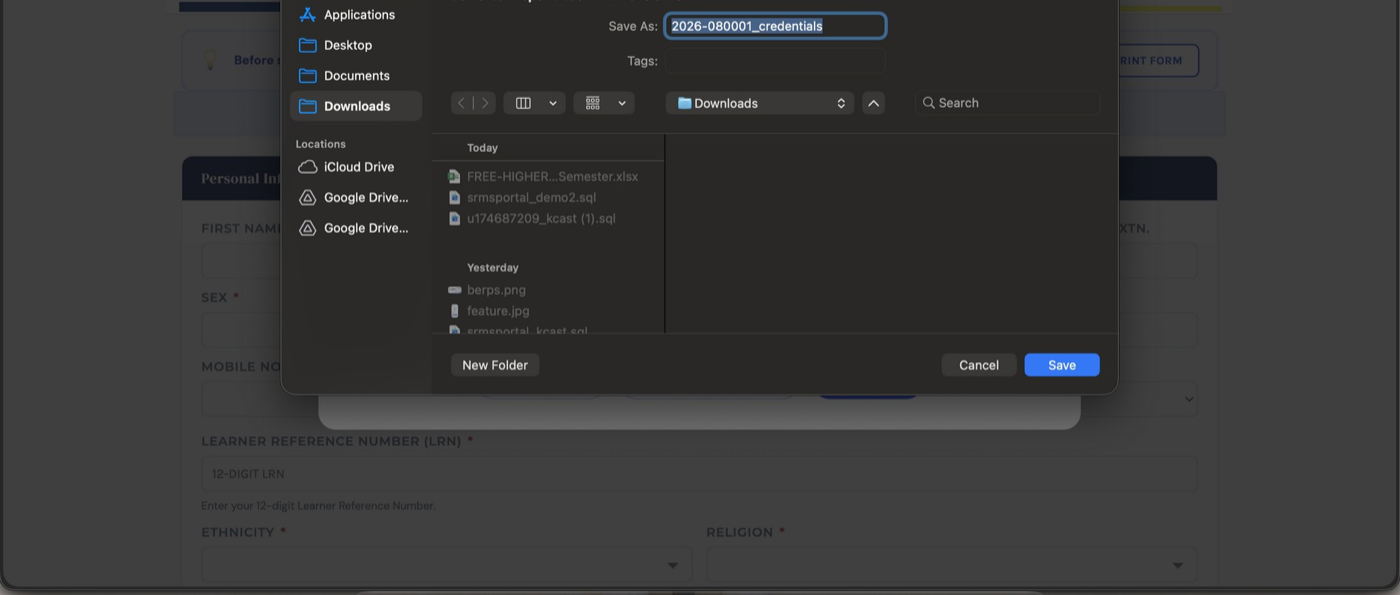
Record and Download Your Credentials
Once registration succeeds, a confirmation window displays your account credentials — your Username, registered Email, and Password. Carefully take note of these details, as you will need them to log in. Click DOWNLOAD CREDENTIALS to save a copy to your device, then choose a location and click Save. You may also use COPY PASSWORD for convenience.
 Click to expand
 Click to expand
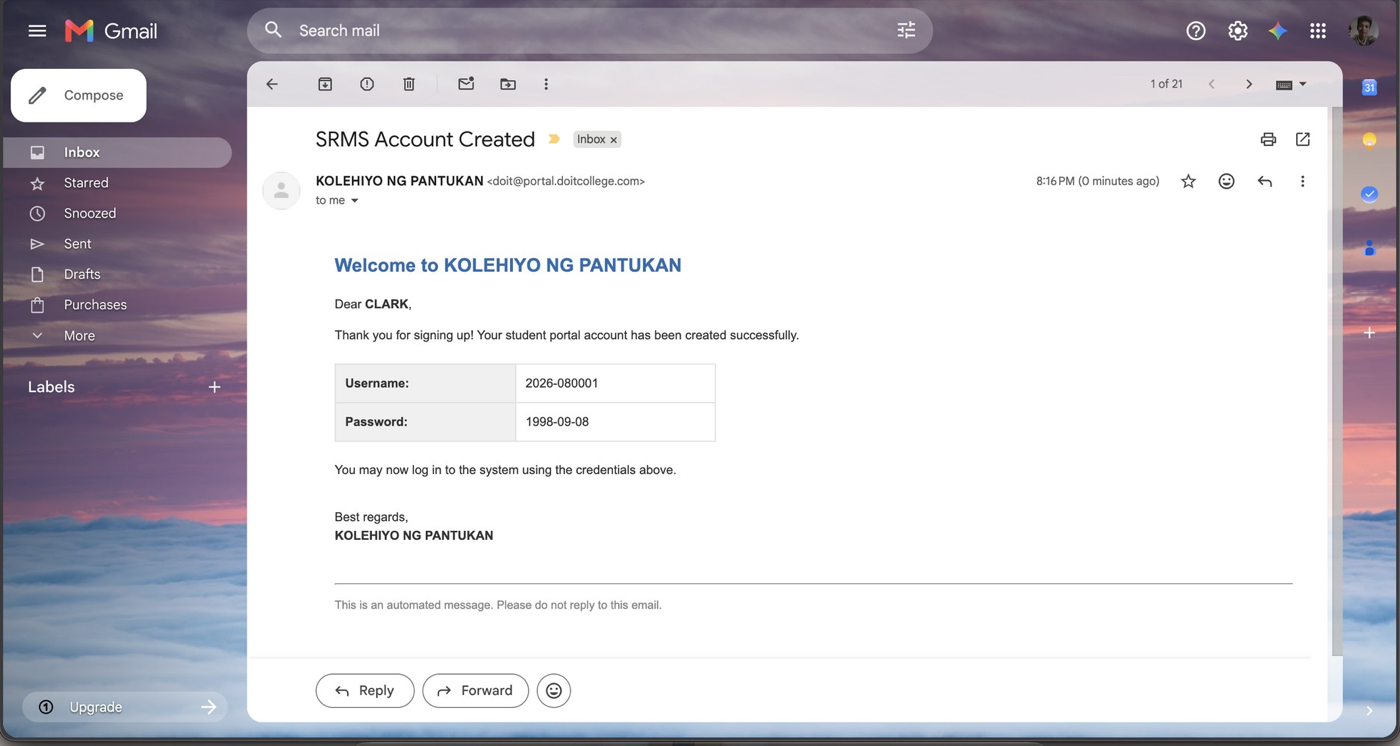
Receive Your Credentials by Email
For your security and reference, the same credentials are automatically sent to your registered email address. Open the message titled "SRMS Account Created" to confirm your Username and Password. Keep this email — it is your backup copy.
 Click to expand
Profile the Student from Online (Desktop App)
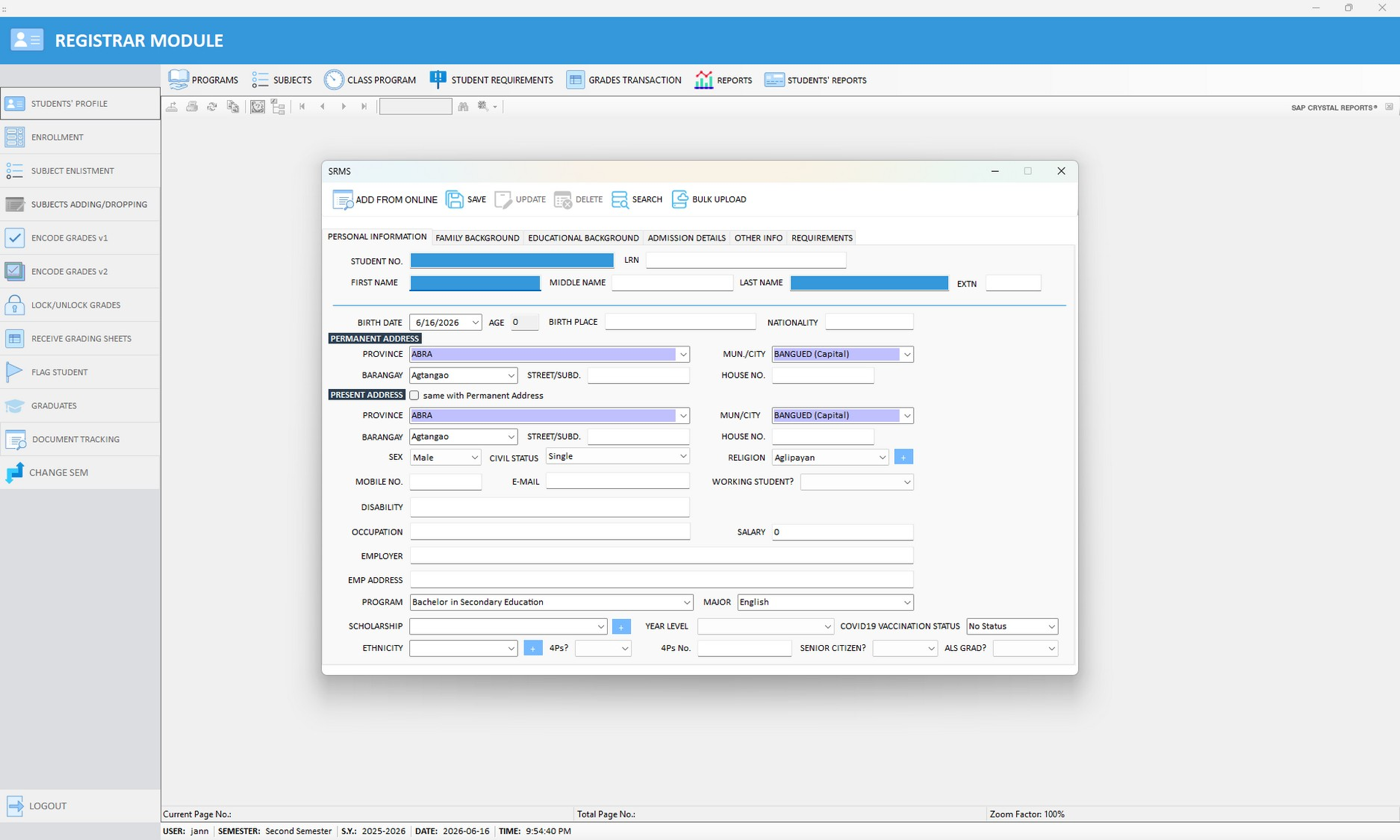
In the SRMS Desktop application, open the Registrar Module and go to STUDENTS' PROFILE. On the student profile form, click ADD FROM ONLINE.
 Click to expand
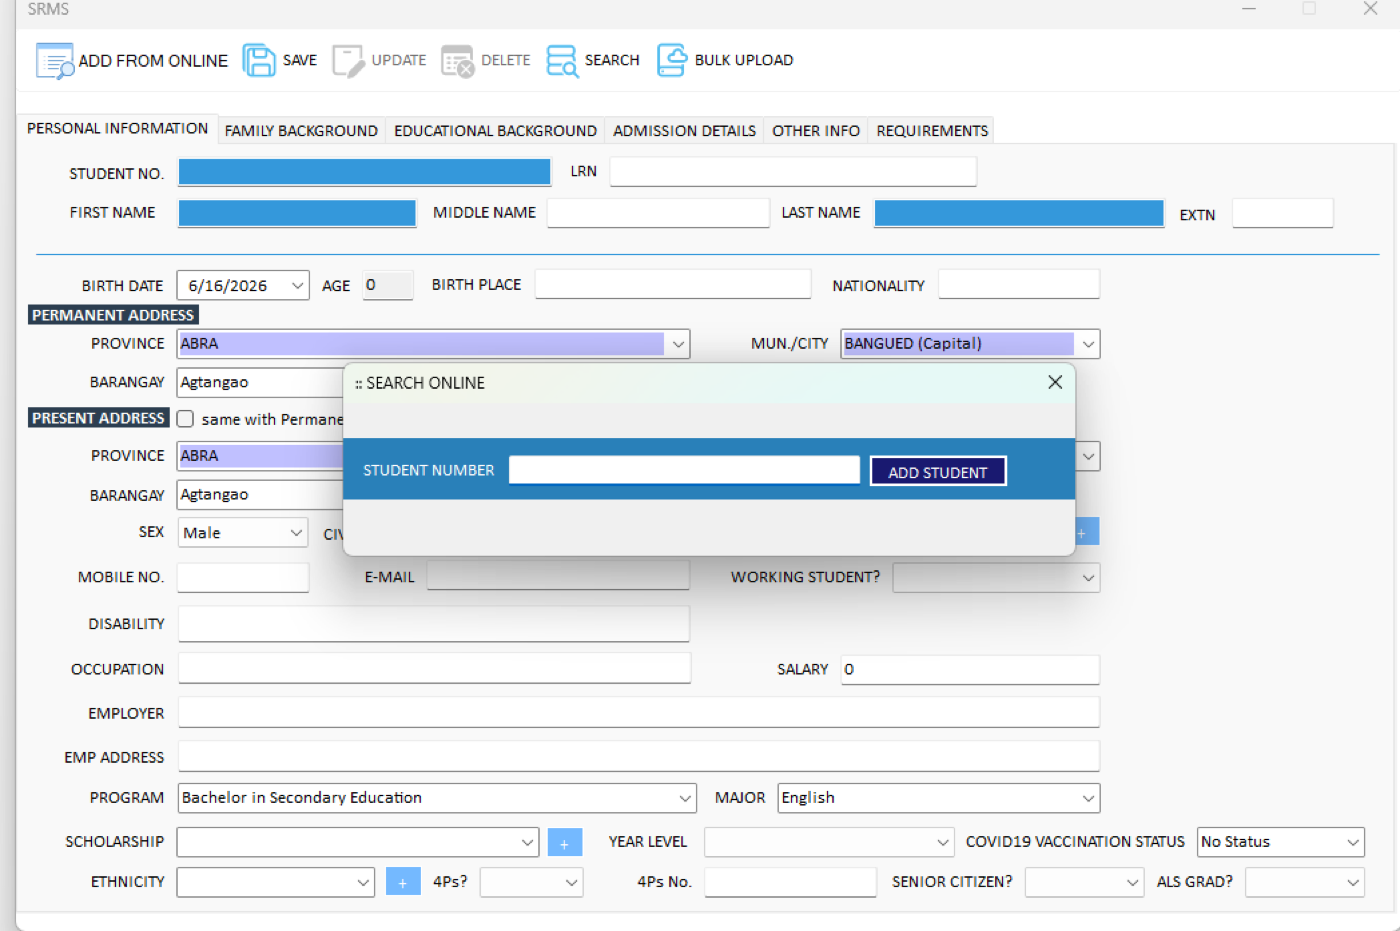
In the Search Online window, enter the Student Number shown in the credentials presented by the student, then click ADD STUDENT.
 Click to expand
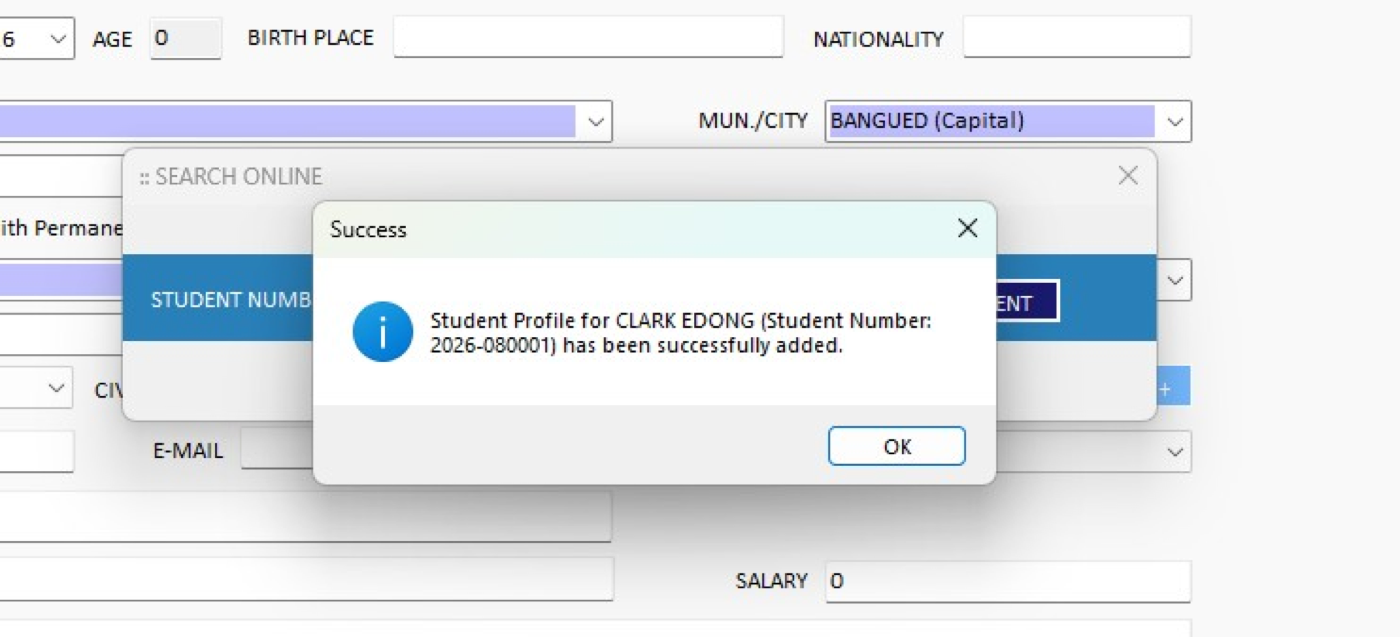
A success message confirms that the student's profile has been added.
 Click to expand
Important: After profiling — or at the end of a batch of student transactions — make sure to upload the database online so the records sync and enrollment can proceed.
Log In to the Student Portal
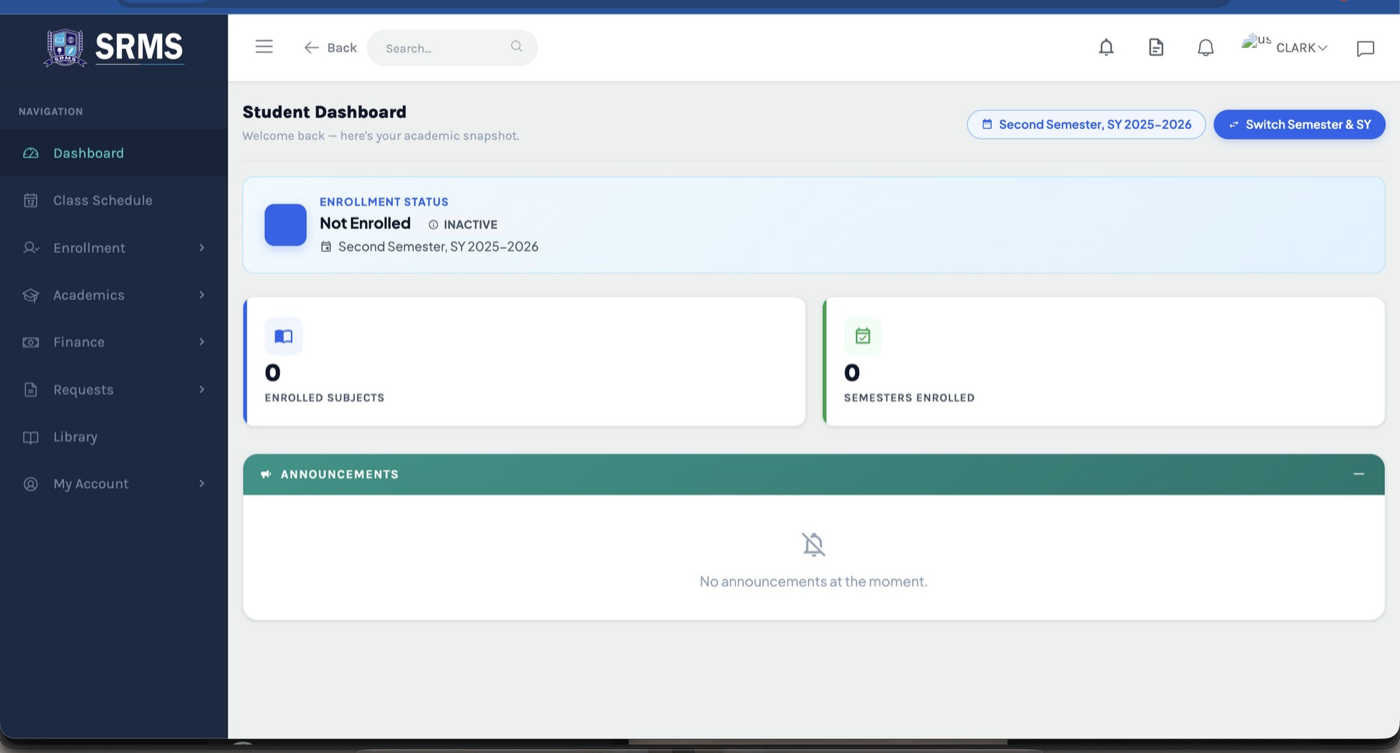
After the registrar has profiled the student, the student logs in to the SRMS Portal using the username and password from their credentials.
The Student Dashboard then appears. At this stage the enrollment status shows Not Enrolled — this is expected, as the student has not yet enrolled.
 Click to expand
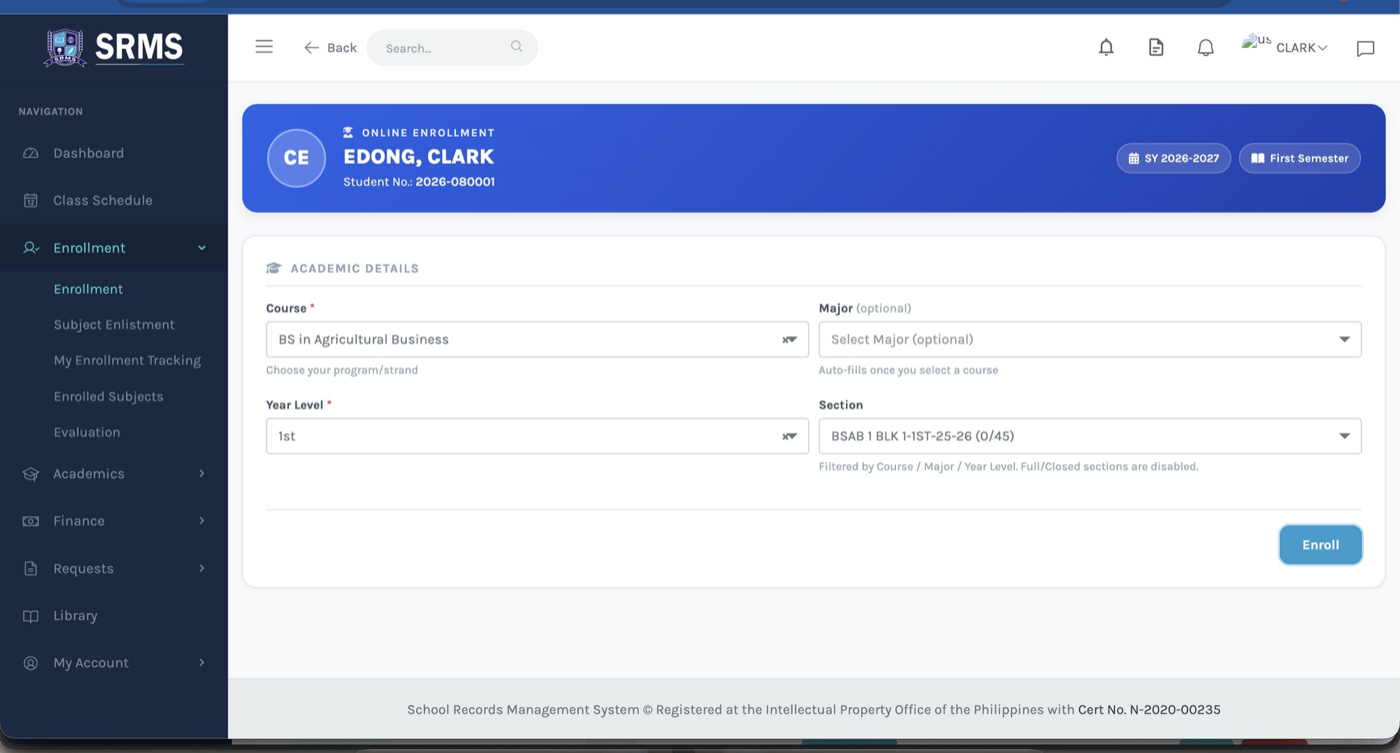
Enroll Yourself (Online Enrollment)
From the left-hand menu, go to Enrollment → Enrollment. Under Academic Details, select your preferred Course and Major (if applicable), then choose your Year Level and Section. Click ENROLL to submit.
 Click to expand
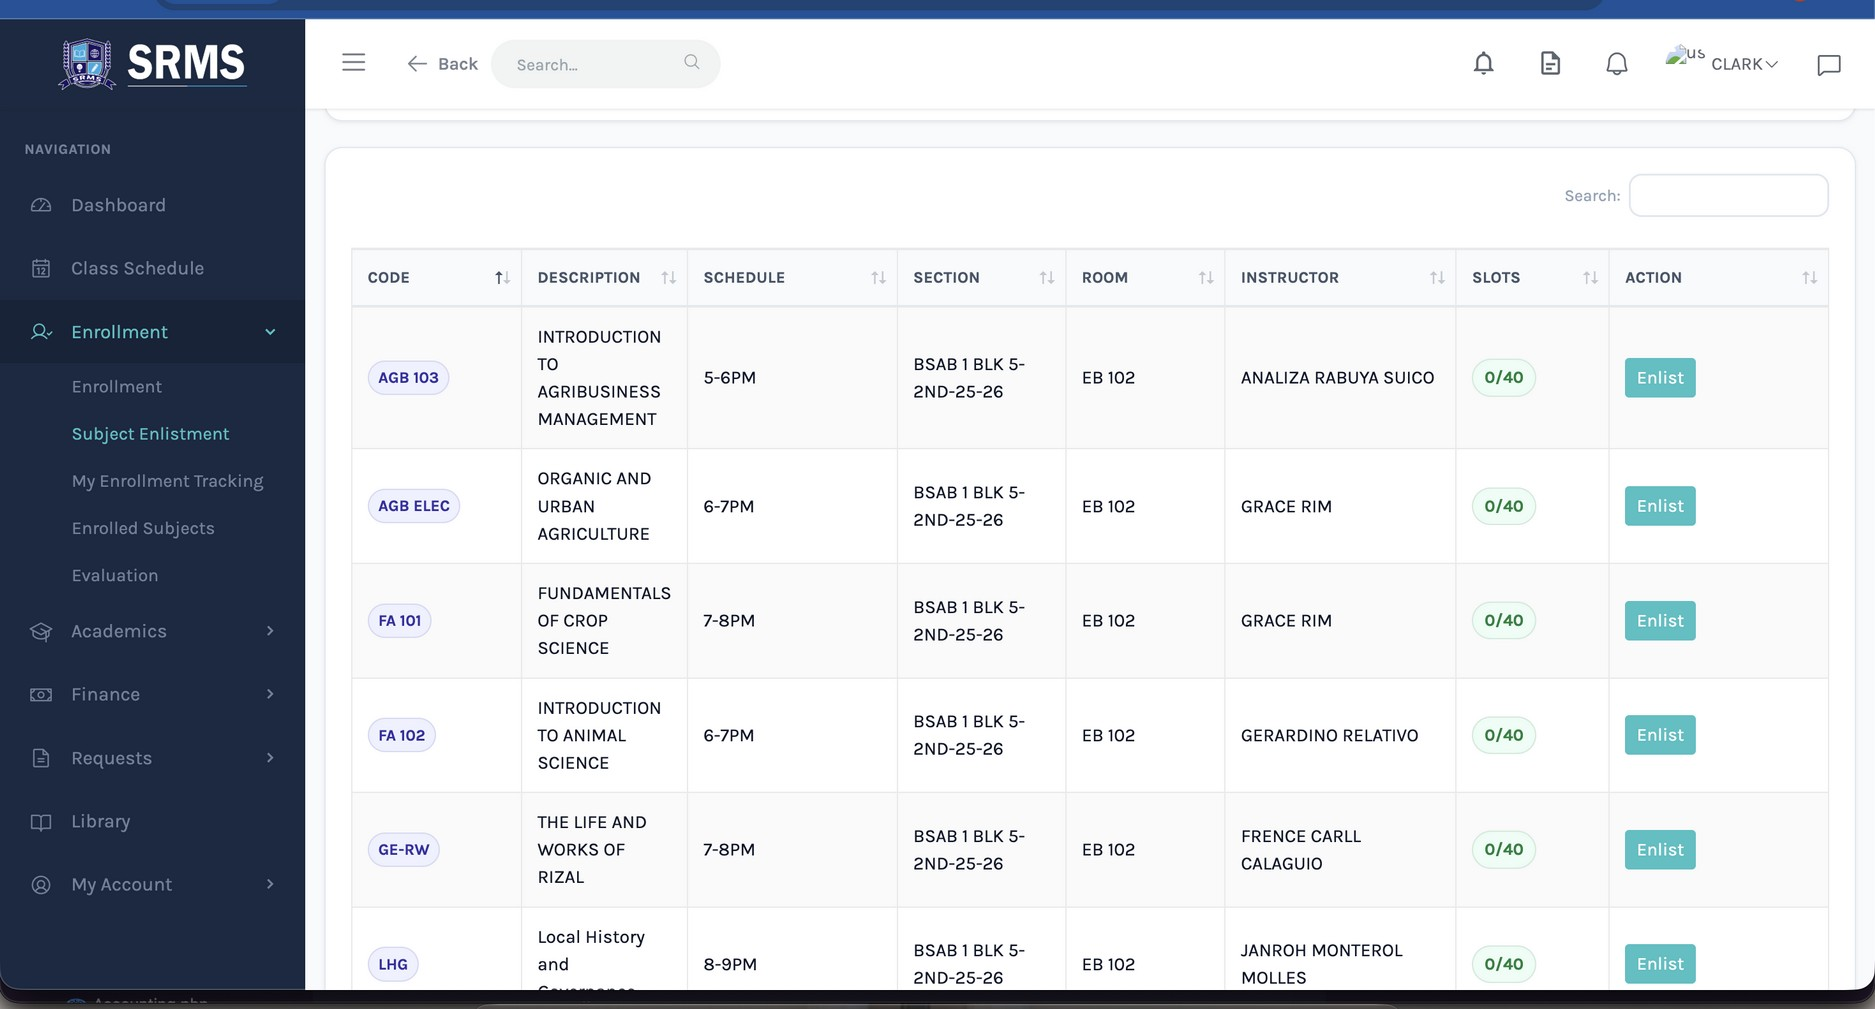
Enlist Your Subjects (Subject Enlistment)
Still under the Enrollment menu, go to Subject Enlistment. Review the list of available subjects and enlist them one by one by clicking the ENLIST button on each row.
 Click to expand
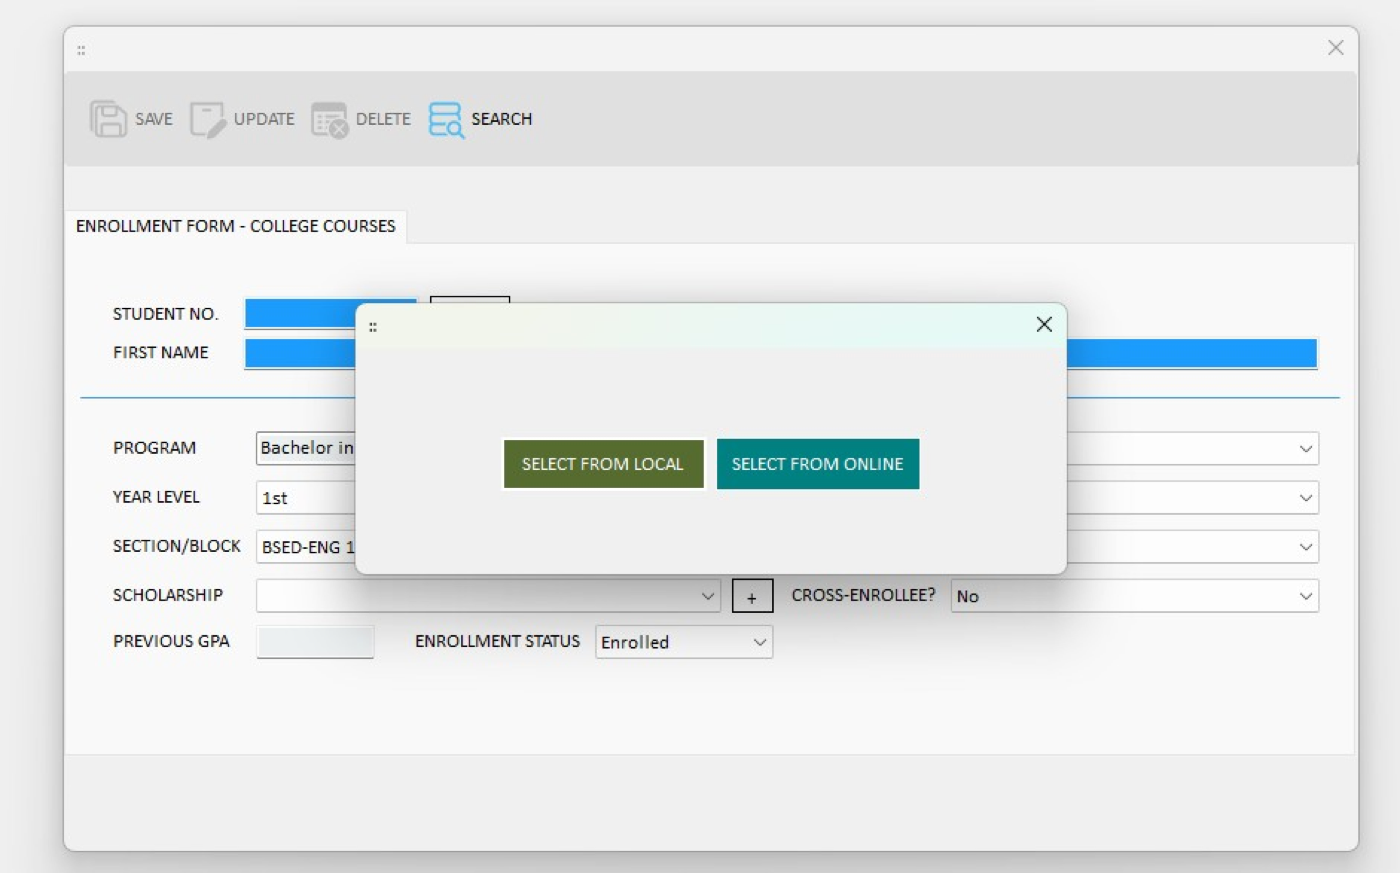
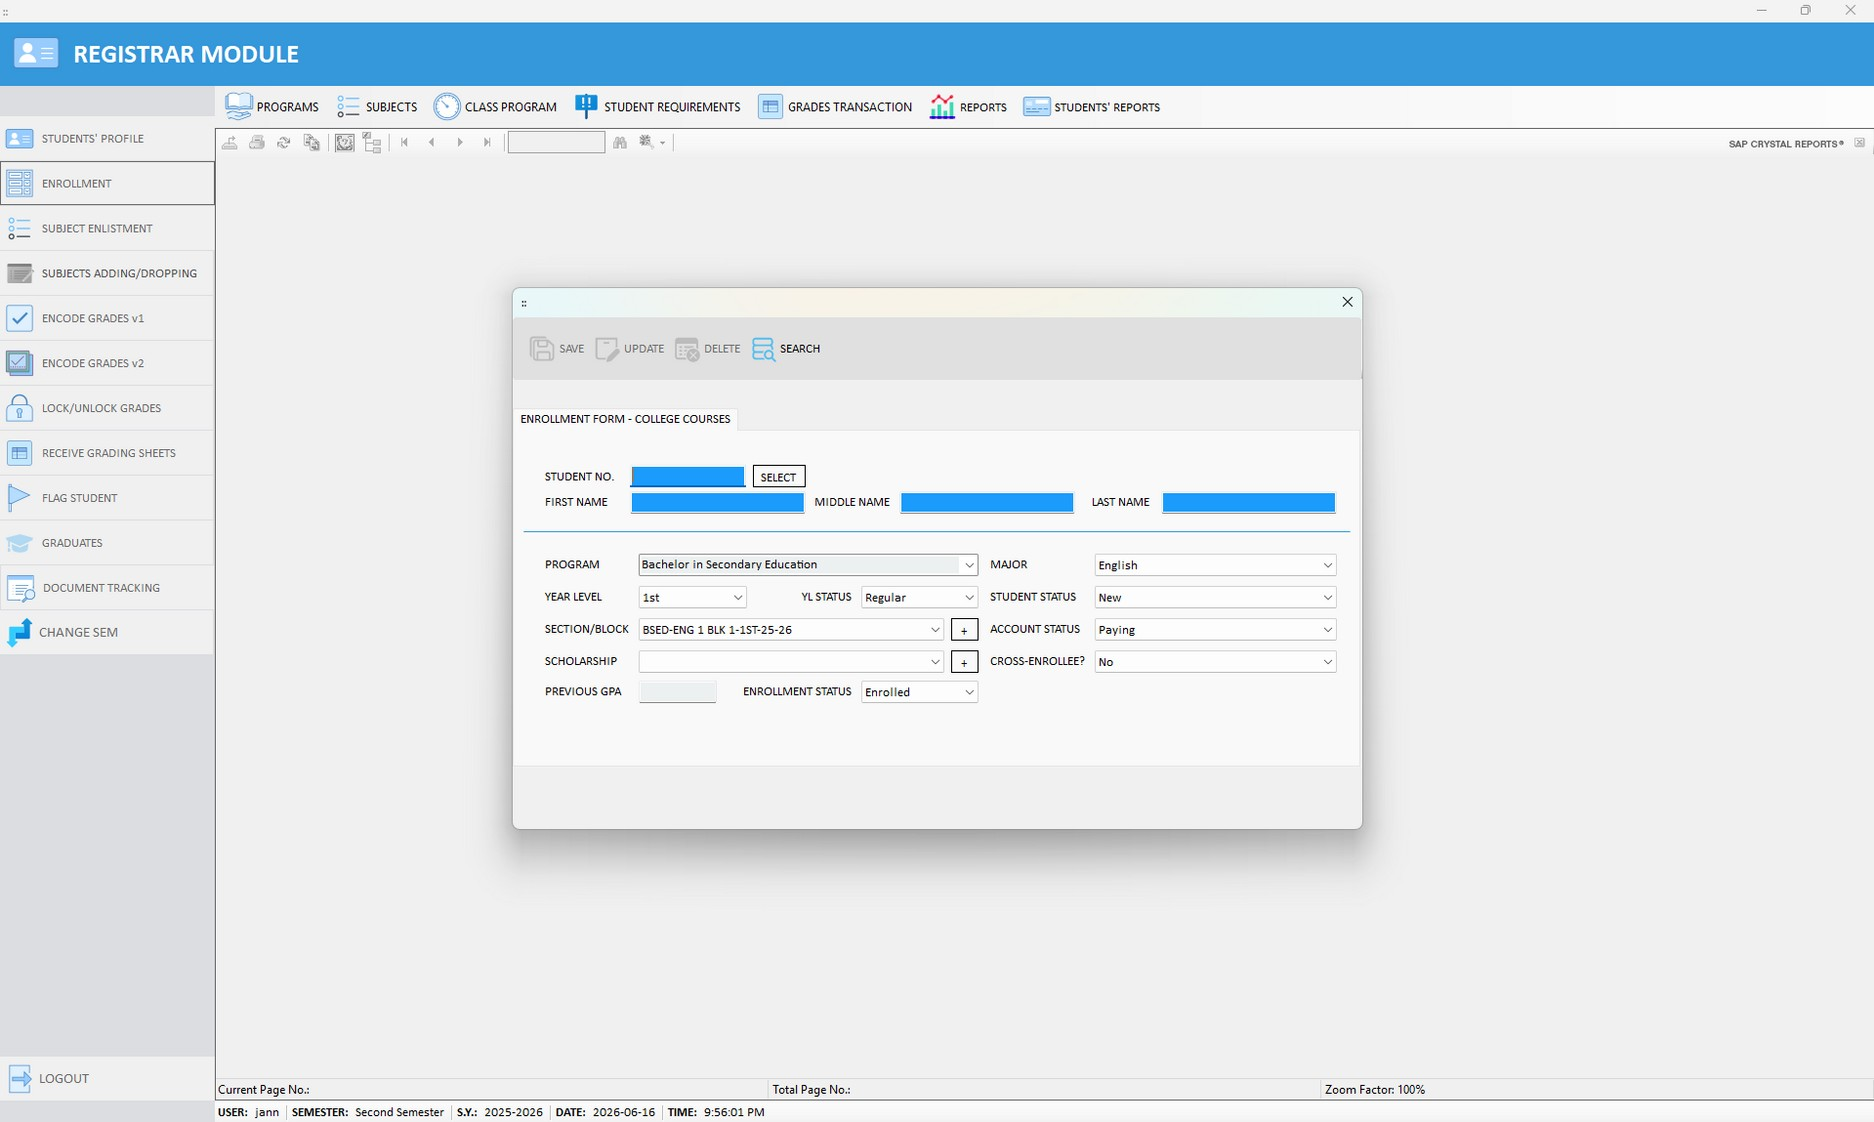
Enroll the Student (Desktop App)
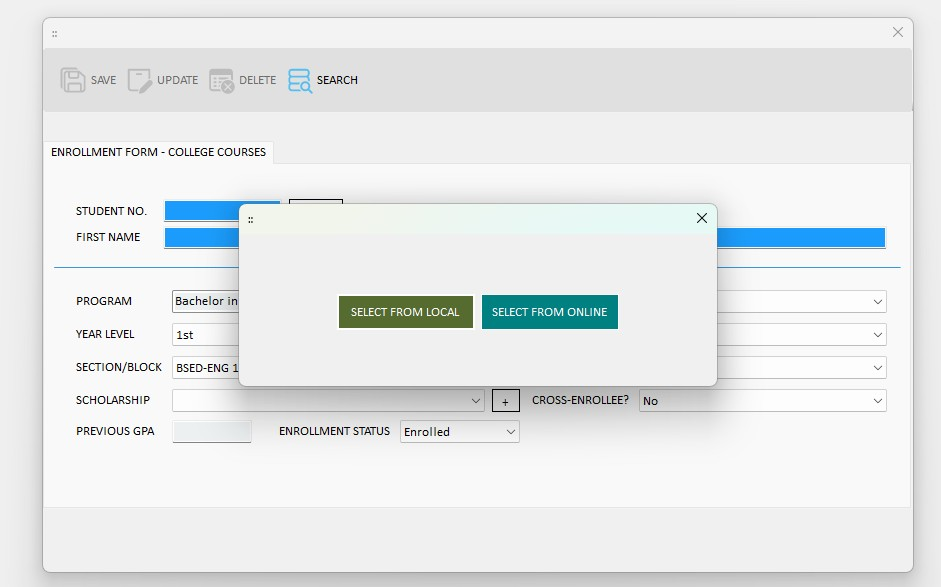
In the Registrar Module, go to ENROLLMENT to open the Enrollment Form. Click the SELECT button beside Student No., then choose SELECT FROM ONLINE.
 Click to expand
 Click to expand
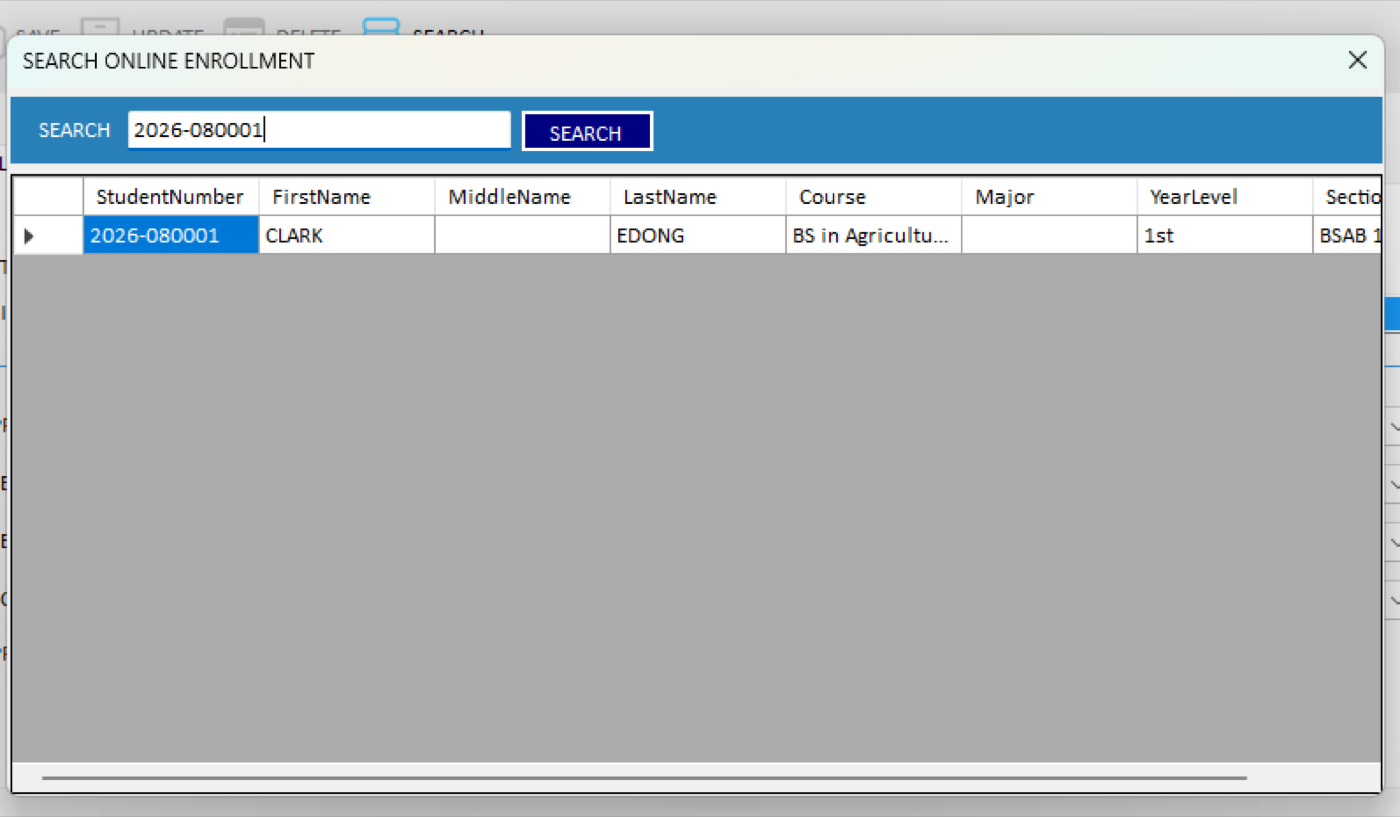
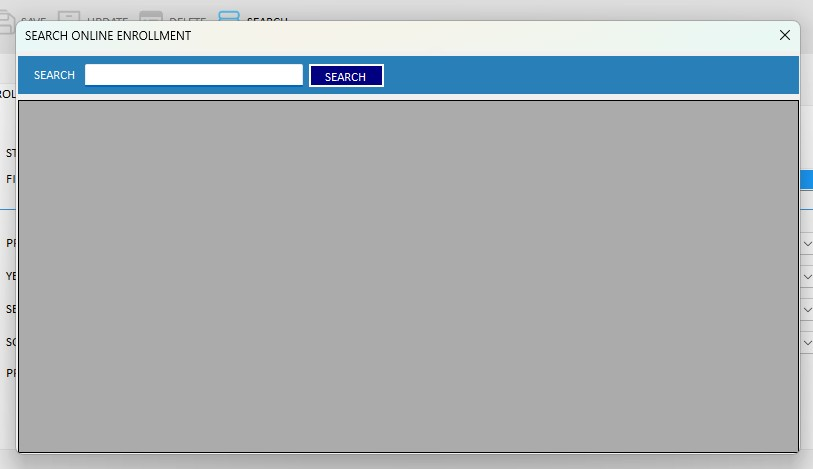
In the Search Online Enrollment window, search for the student, then double-click the correct record to select it.
 Click to expand
 Click to expand
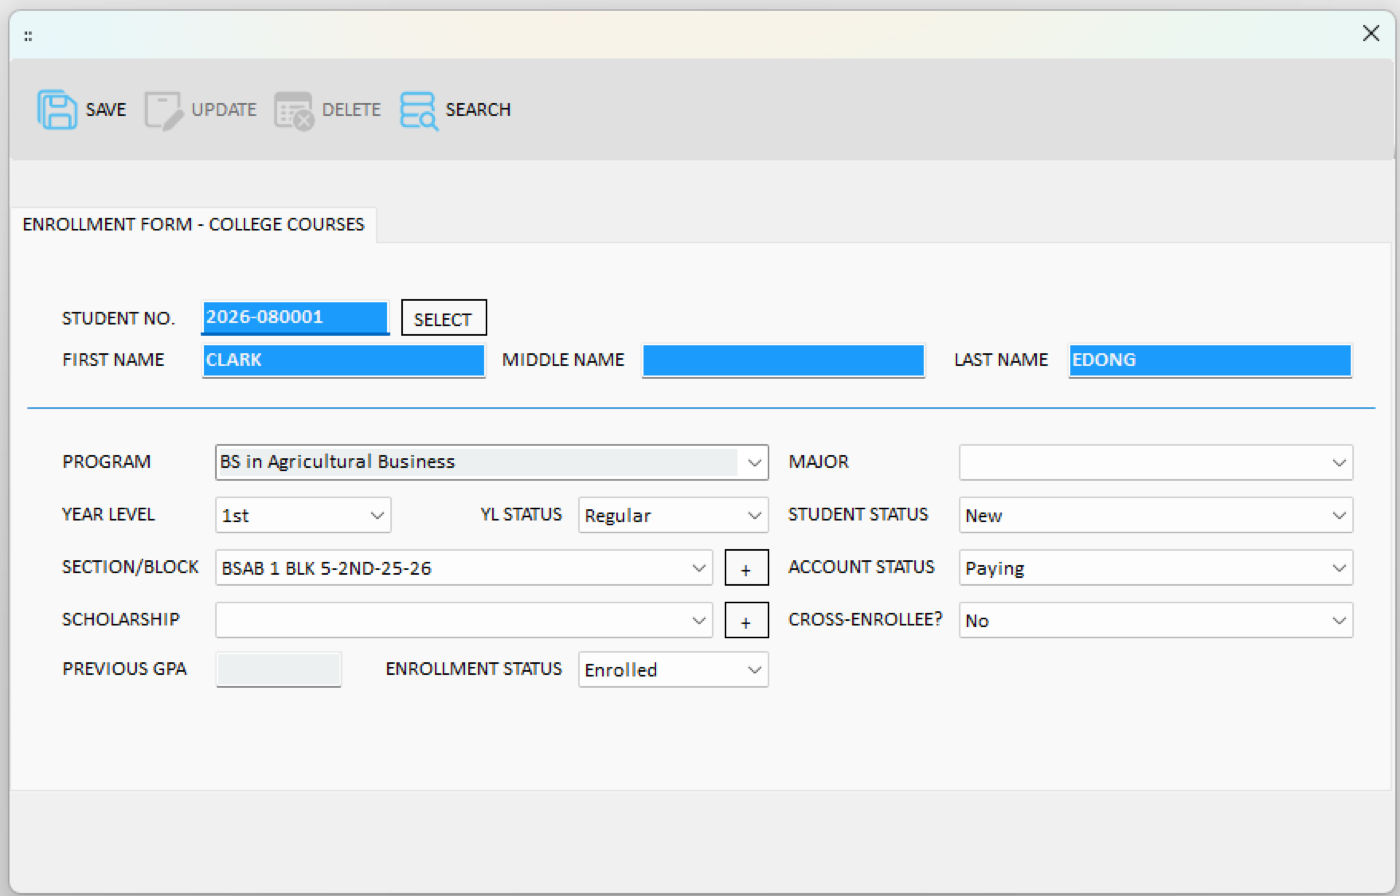
The student's data loads into the enrollment form. Complete any remaining fields (such as student status, account status, and section/block), then click SAVE.
 Click to expand
Enlist the Student's Subjects (Desktop App)
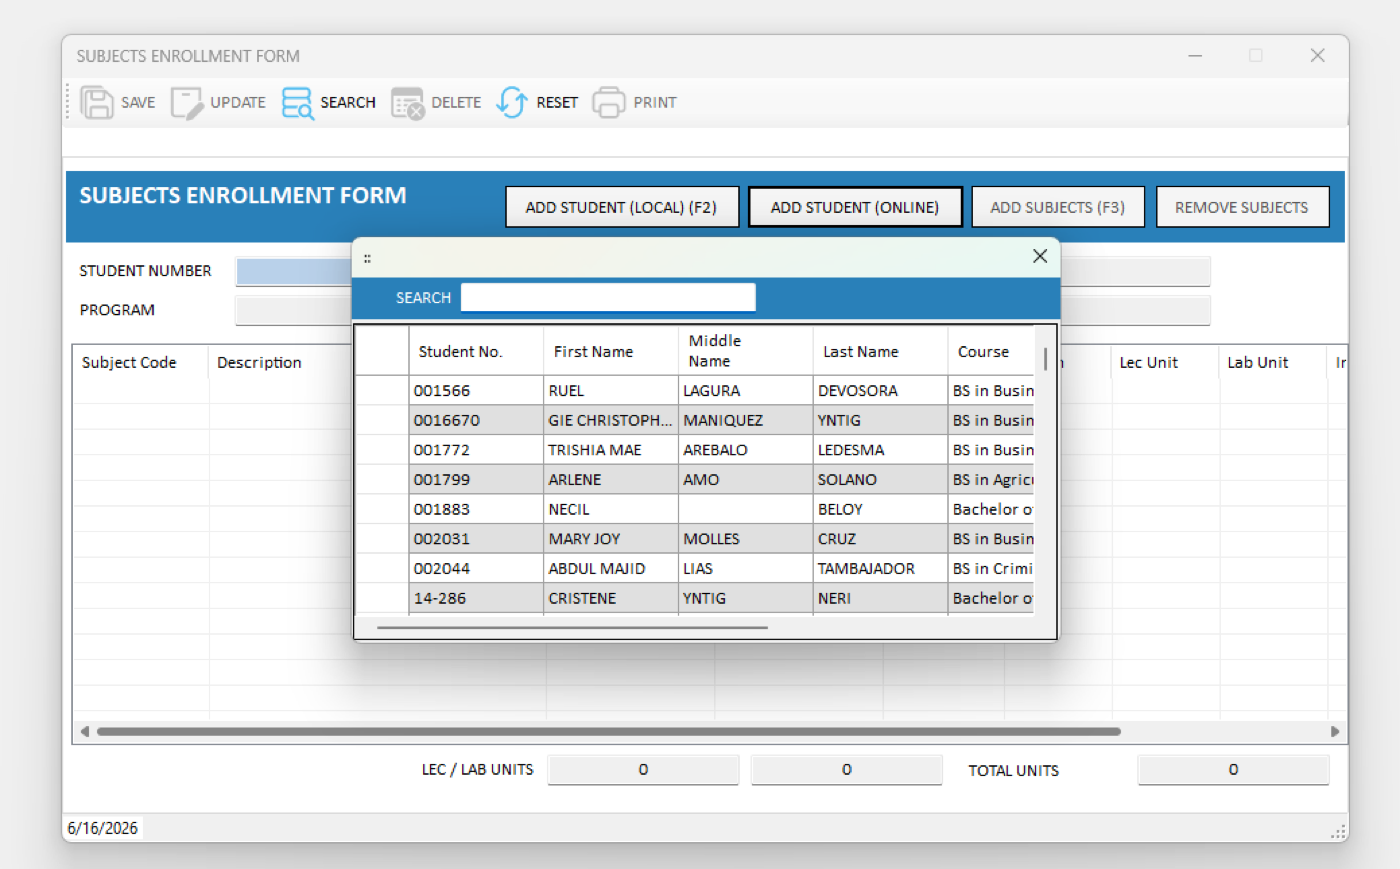
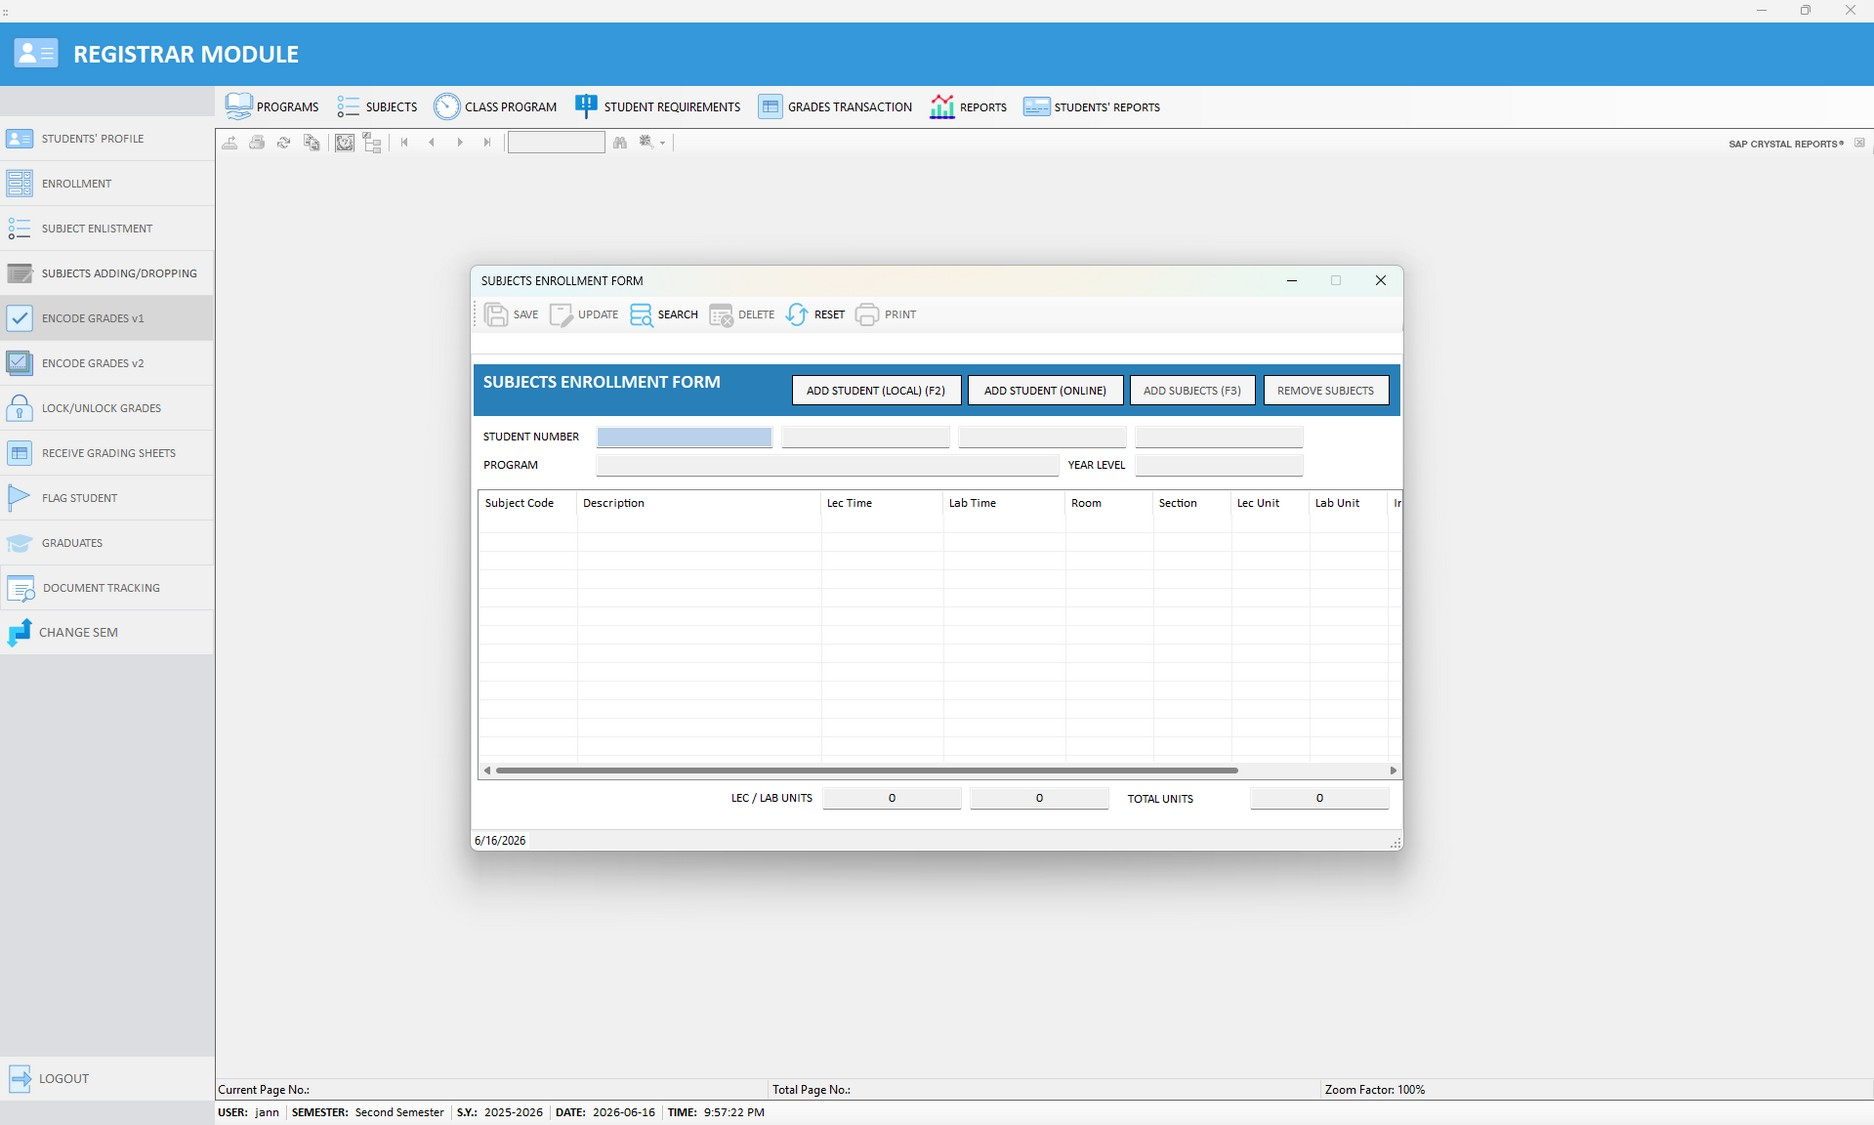
Based on the student's online self-enlistment, the registrar mirrors the subjects in the Desktop application. In the Registrar Module, go to SUBJECT ENLISTMENT to open the Subjects Enrollment Form, then click ADD STUDENT (ONLINE).
 Click to expand
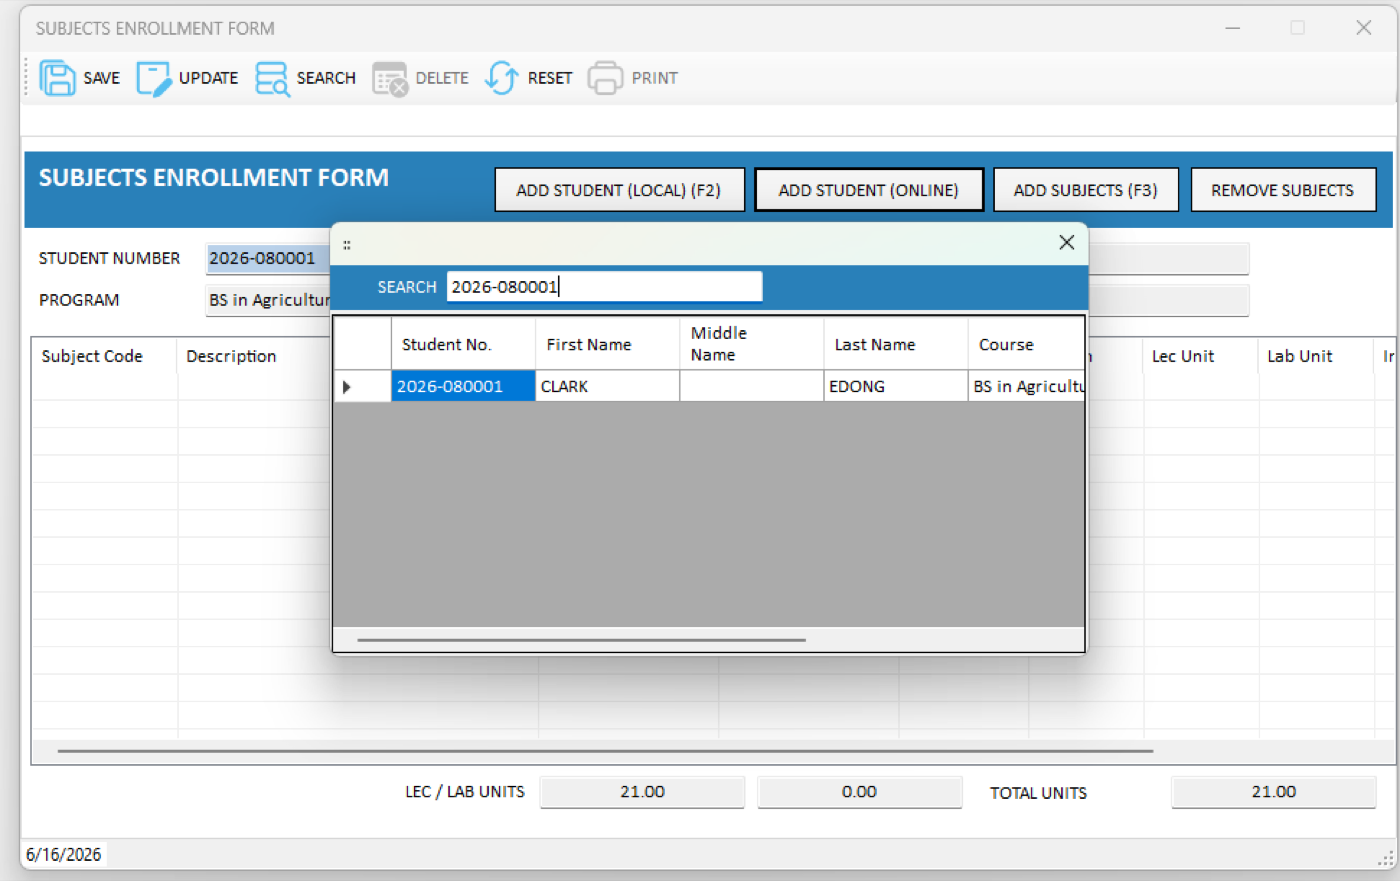
Search for the student in the pop-up window, then select the correct student record.
 Click to expand
 Click to expand
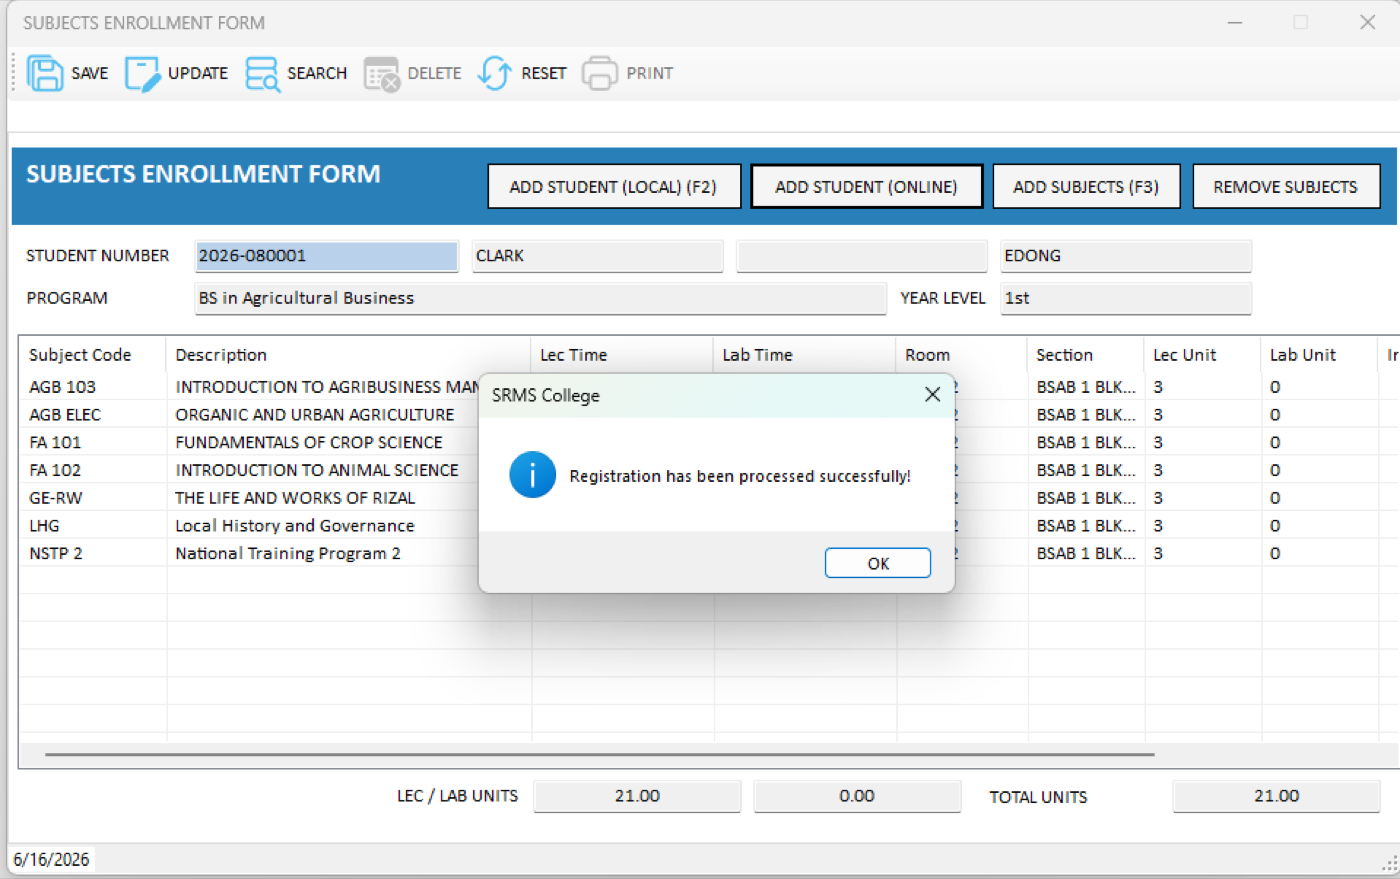
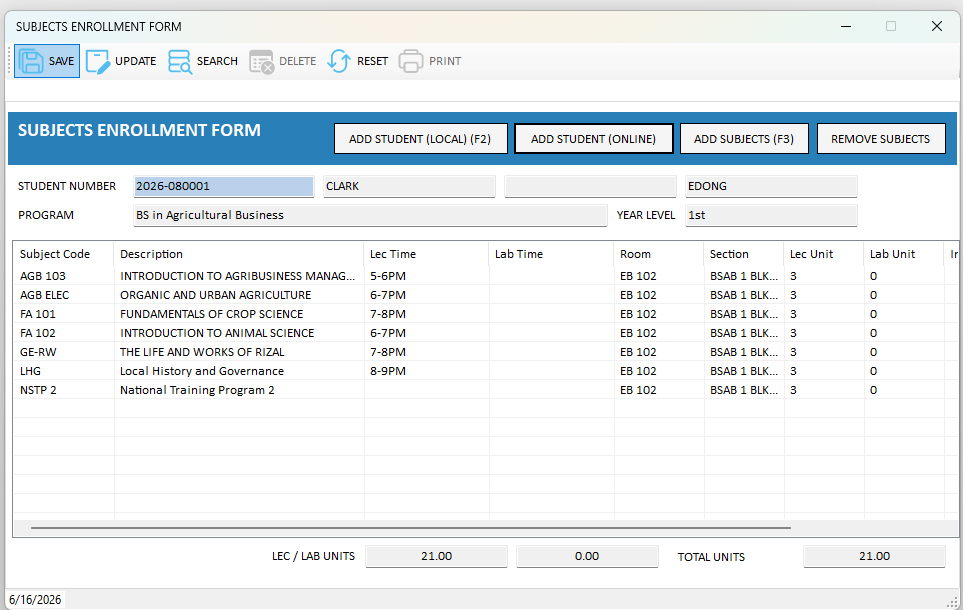
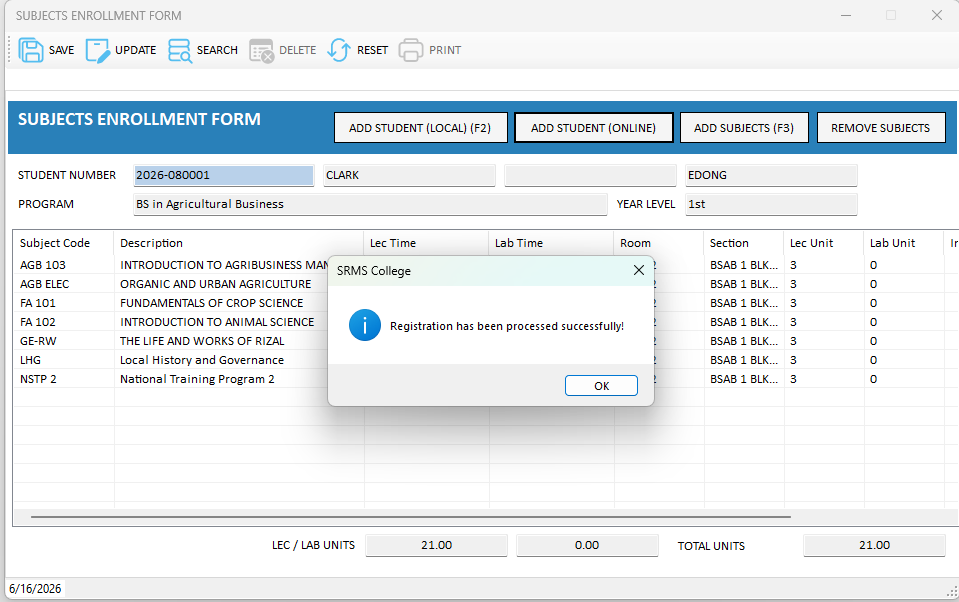
The student's enlisted subjects load automatically, along with the total units. Click SAVE. A success prompt confirms the registration has been processed.
 Click to expand
 Click to expand
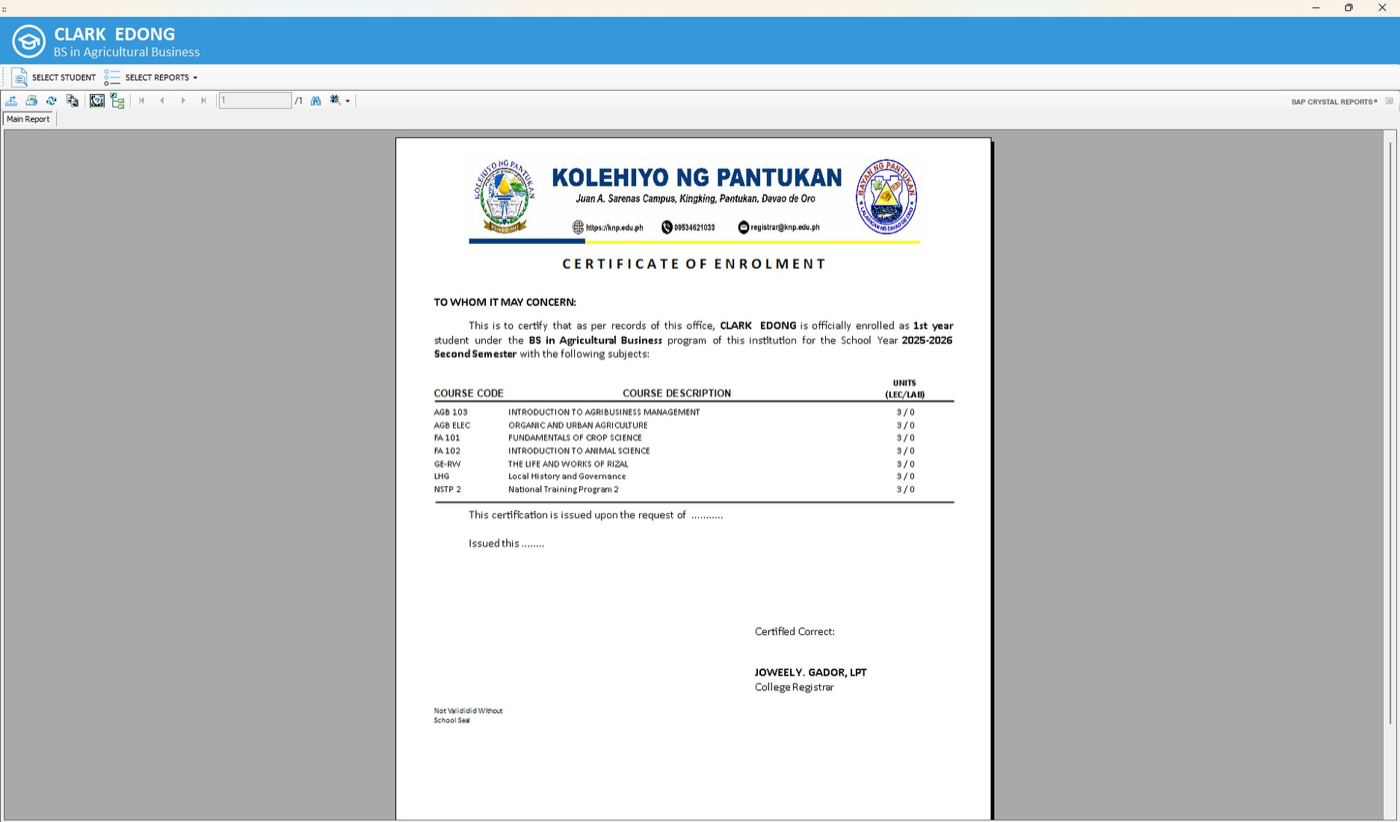
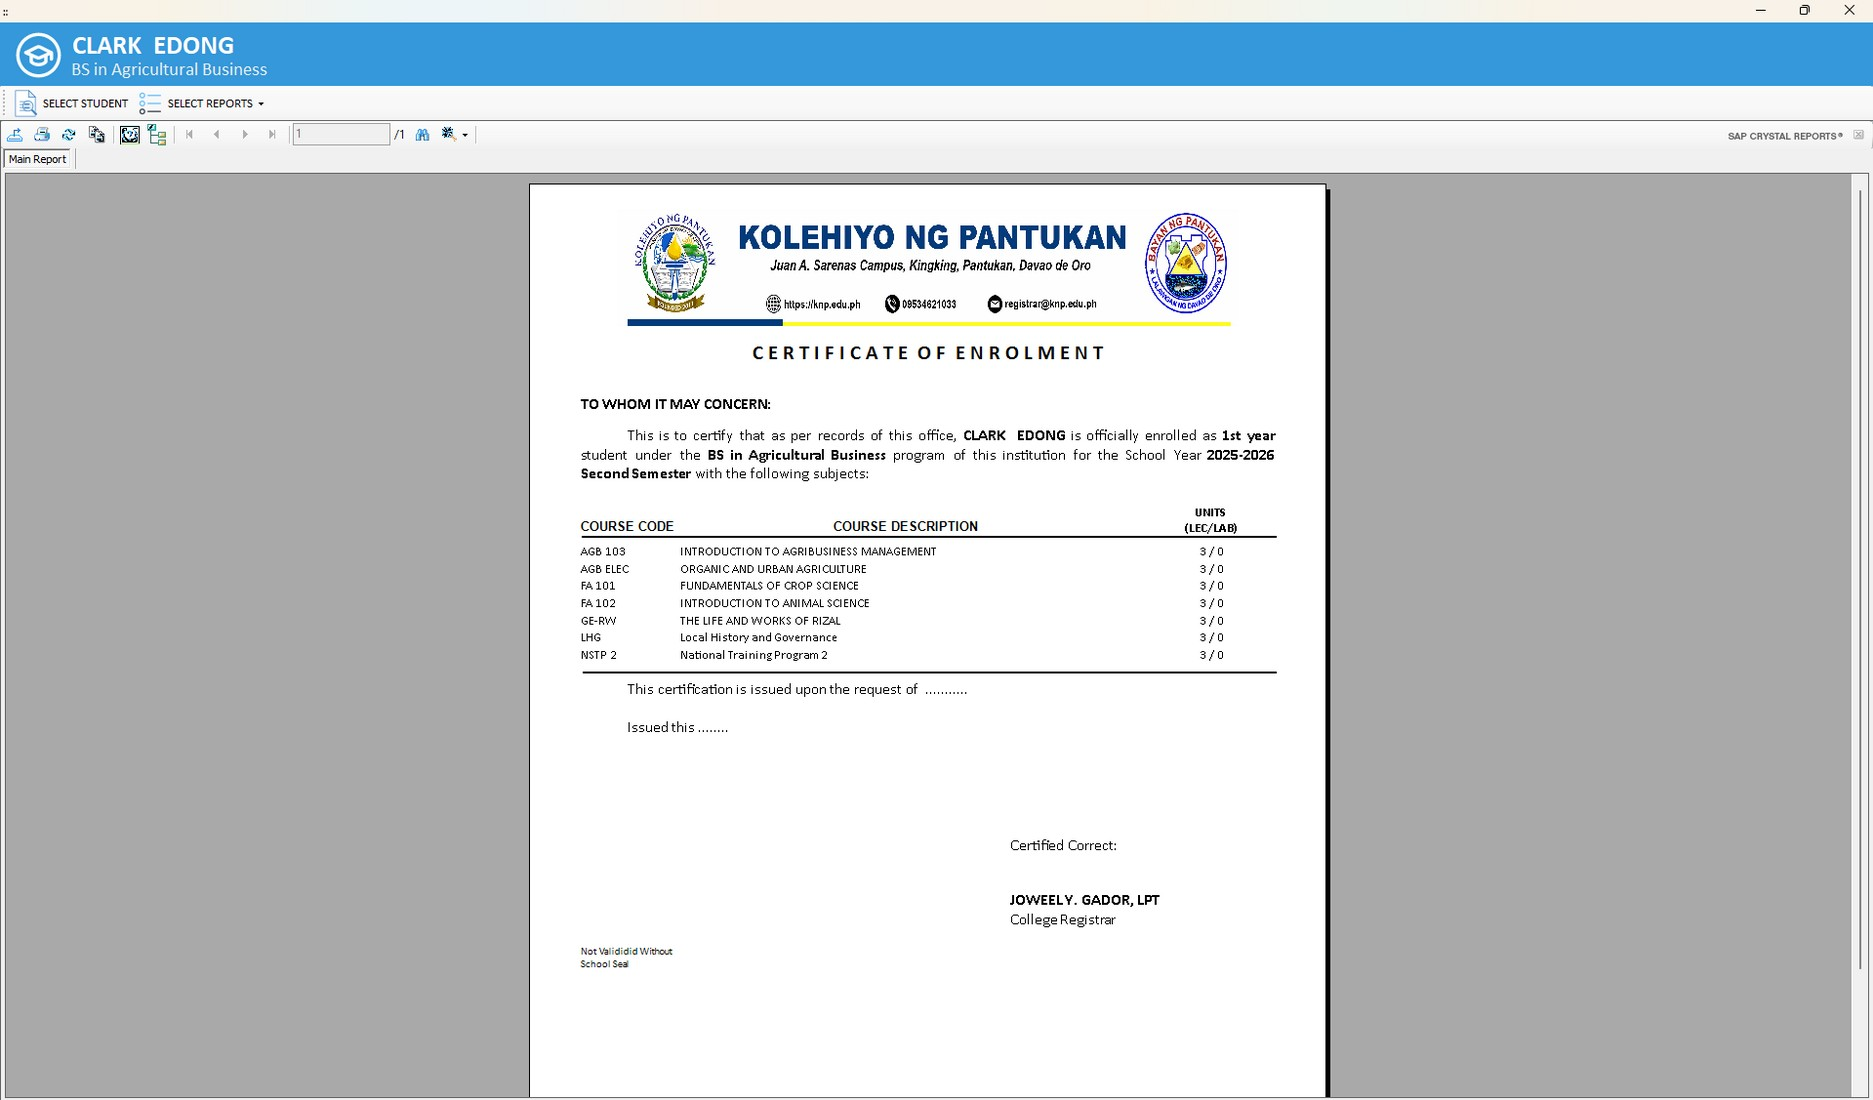
Print the Certificate of Enrollment
The student is now officially enrolled. The registrar can generate and print the Certificate of Enrollment, which lists the student's program, year level, semester, and enrolled subjects with their corresponding units.
 Click to expand
Overview
Student + RegistrarThis part is intended for existing (continuing) students who are re-enrolling for a new term. Because they already have an SRMS account and an existing student profile, they no longer need to sign up or be profiled by the registrar — they begin directly by logging in and enrolling for the current School Year and Semester.
Process at a Glance
- Student Steps 1–4: Log in, set the current School Year and Semester, enroll, and enlist subjects.
- Registrar Steps 5–6: Enroll the student and enlist the subjects in the SRMS Desktop application.
- Registrar Step 7: Print the Certificate of Enrollment.
Log In to the Student Portal
Open a web browser and go to the SRMS Portal login page. Enter the Username and Password from your existing account, then sign in.
Note: If you have forgotten your credentials, contact the registrar's office before proceeding.
 Click to expand
Set the Current School Year & Semester
After logging in, the Student Dashboard appears. Check the term shown at the top. If it is not yet the term you are enrolling for, click SWITCH SEMESTER & SY and select the current School Year and Semester. Your status will show Not Enrolled for the selected term — this is expected.
 Click to expand
Enroll to the Current Semester
From the left-hand menu, go to Enrollment → Enrollment. Confirm your Course and Major, then select your Year Level and Section for the current term. Click ENROLL to submit your enrollment for the active School Year and Semester.
 Click to expand
Enlist Your Subjects
Still under the Enrollment menu, go to Subject Enlistment. Review the available subjects for the current term and enlist them one by one by clicking the ENLIST button on each row.
 Click to expand
Enroll the Student (Desktop App)
In the SRMS Desktop application, open the Registrar Module and go to ENROLLMENT. Click the SELECT button beside Student No., then choose SELECT FROM ONLINE.
 Click to expand
 Click to expand
In the Search Online Enrollment window, search for the student, then double-click the correct record to load it.
 Click to expand
 Click to expand
The student's data loads into the enrollment form. Verify the details, complete any remaining fields, then click SAVE.
 Click to expand
Enlist the Student's Subjects (Desktop App)
Based on the student's online self-enlistment, the registrar mirrors the subjects in the Desktop application. In the Registrar Module, go to SUBJECT ENLISTMENT to open the Subjects Enrollment Form, then click ADD STUDENT (ONLINE). Search for the student and select the correct record.
 Click to expand
 Click to expand
 Click to expand
The student's enlisted subjects load automatically, along with the total units. Click SAVE — a success prompt confirms the registration has been processed.
 Click to expand
 Click to expand
Print the Certificate of Enrollment
The student is now officially enrolled for the current term. The registrar can generate and print the Certificate of Enrollment, which lists the student's program, year level, School Year and Semester, and enrolled subjects with their corresponding units.
 Click to expand
Enrollment Complete
With prerequisites and class schedules configured, students can self-enroll end to end. Each student's record then exists both on the SRMS Portal and in the SRMS Desktop application, and the Certificate of Enrollment serves as official proof of enrollment.
Powered by Softtech Solutions and Services Co.